Charnoff Production Studio Training
System Overview #
Start at DKC
Tell Tell
Show rules in studio foyer
Tell
Point out Studio vs. Control Booth
Turn on work lights in Studio
Tell
Power on cameras, talent monitor, and teleprompters
Tell
Point cameras at stool
Show camera controls:
Zoom
Focus (easiest if you are zoomed in)
Switching between zoom/focus
Autofocus
Iris
Show camera movement
Locking feet
Pan lock/unlock and movement
Tilt lock/unlock and movement
Raising/lowering lock and movement with orange lever
Leave two cameras pointing at stool, each with different angle and framing/zoom
Leave one camera point towards control booth so we can see teleprompter and talent monitor from booth
Turn off work lights and return to Control Booth
Turn on power strip
Identify stations
Camera Control
Media Control
Lighting Control
Teleprompter Control
Audio Control
Tell
Demonstrate Lighting Control
Tell All fader vs. Spotligts faders (all lights vs. individual control)
Demonstrate Camera Control using broadcast panel
Tell Multiview screen vs. Program screenTell
Live producing (switch between camera while recording)
Edit later (records all cameras and edit together)
Tell Show selecting sources in Preview and Program
Sources are labeled above Program (red) buttons
Show cutting and fading between Preview and Program
Show headphones – hear Program audio and communicate with Camera Operators if you have them
Demonstrate Media Control
Tell Open ATEM software (red and white icon in dock)
If the software doesn’t connect automatically, select Connections from the file menu and then select Charnoff ATEM from the list
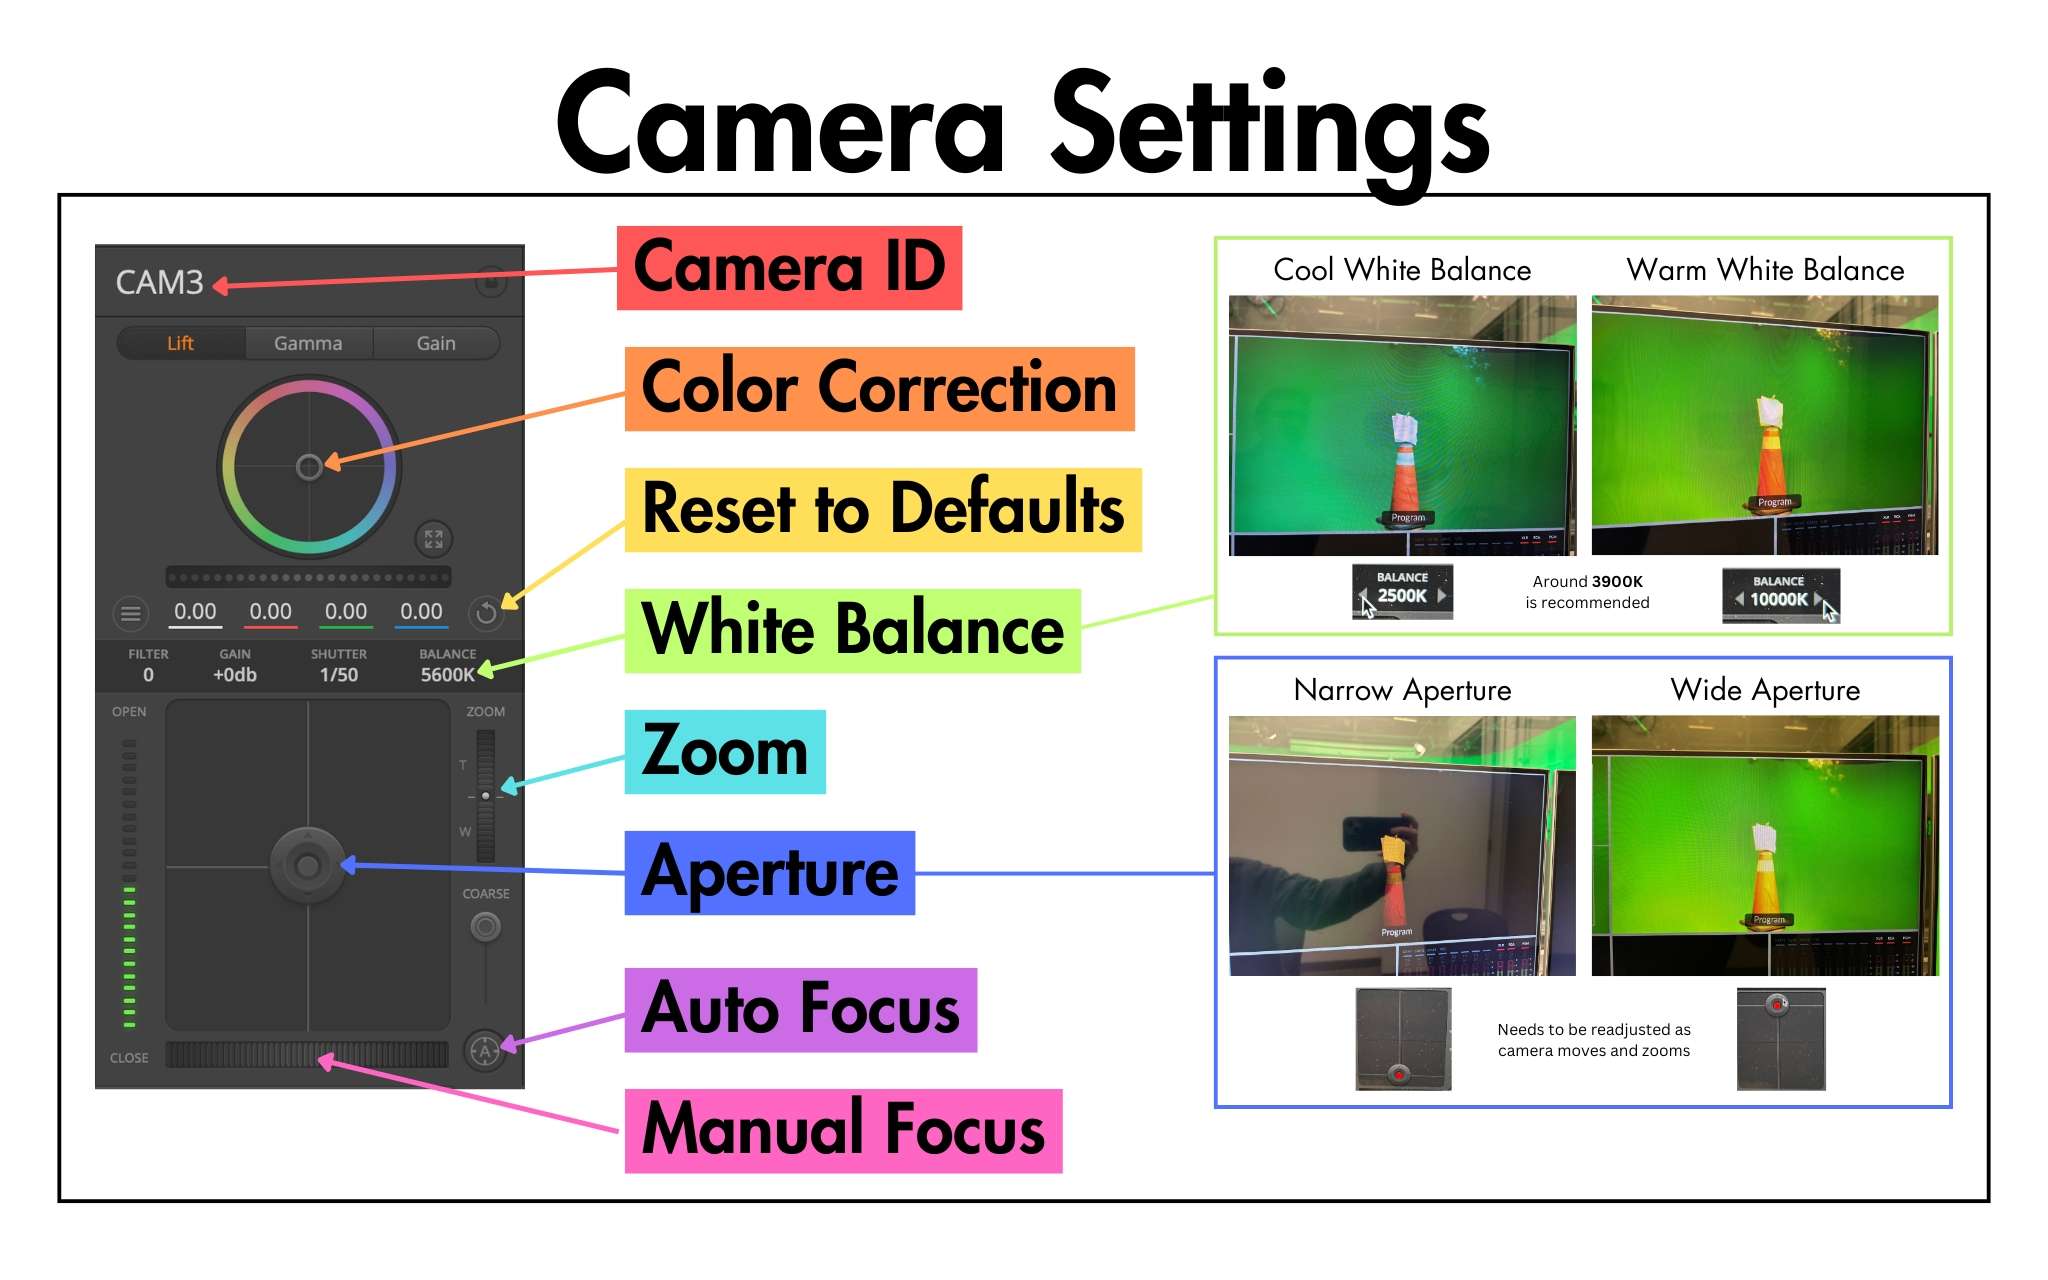
Use ATEM software to adjust camera settings
Select Cameras and demonstrate:
Zoom
Focus
White Balance
Tell : Around 3900K is recommended, but you may want it lower (cooler) or higher (warmer) depending on the look you are going for
Aperture
Tell Internal folder in the dock. More on this later.
Demonstrate Audio Control
Lapel mics 1 – 4 (best)
Shotgun mics (not great)
Audio playback from computer
Adjusting levels on board and computer
[Optional ] Demonstrate Teleprompter Control (we will have training videos to instruct users on this if they need it)
Loading scripts
Selecting screen
Autoscroll and speed control
Practice Recording #
Start a recording and demonstrate camera switching/mics
Stop recording and show how to access files on Media Control computer (Internal folder in the dock at the bottom of the screen)
Show Program recording and individual camera files (ISO folder)
Tell Have trainee do a recording while you are in the studio in front of camera
Allow time for faffing around
Shut Down #
Delete recordings from storage on Media Control computer
Bring down faders on Light Control
Log out computers
Turn off power strip
Power off cameras, teleprompters, and talent monitor
Pull up QR code for trainee to sign agreement
Return Studio Kit to Info Desk
Charnoff Production Studio Terms of Use
