Category: 3D Printed Bagpipes Project

  • Wrapping up!

    Hello once more!

    It has been quite a bit since my last post! (not really because I just posted it, but it has been a while since I wrote it!!!!)

    Anyway, goofs aside, there is so much to update about. I can’t say that I have officially finished the 3D printed bagpipes yet, as I currently (May 7th, 2024 at 1:38pm) still have the final piece on the printer.

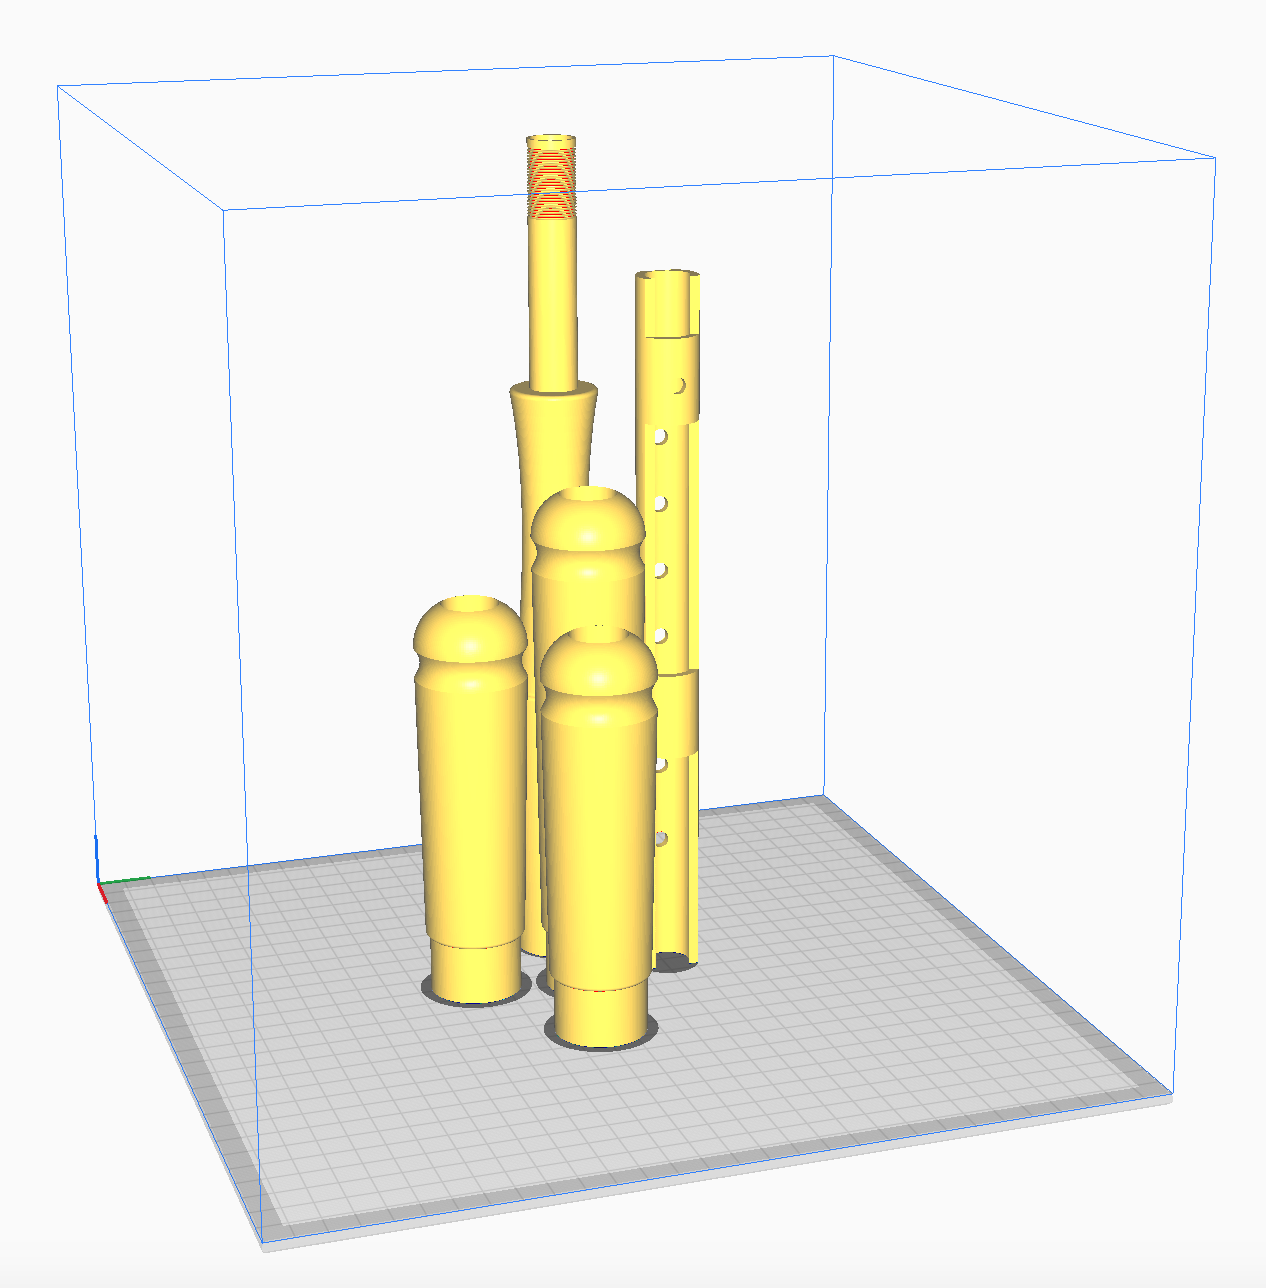
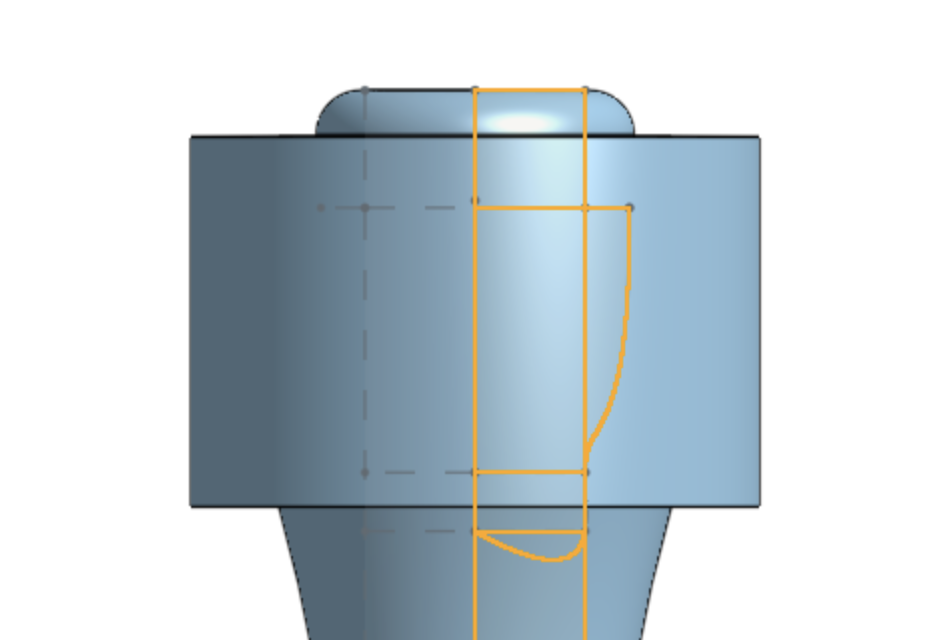
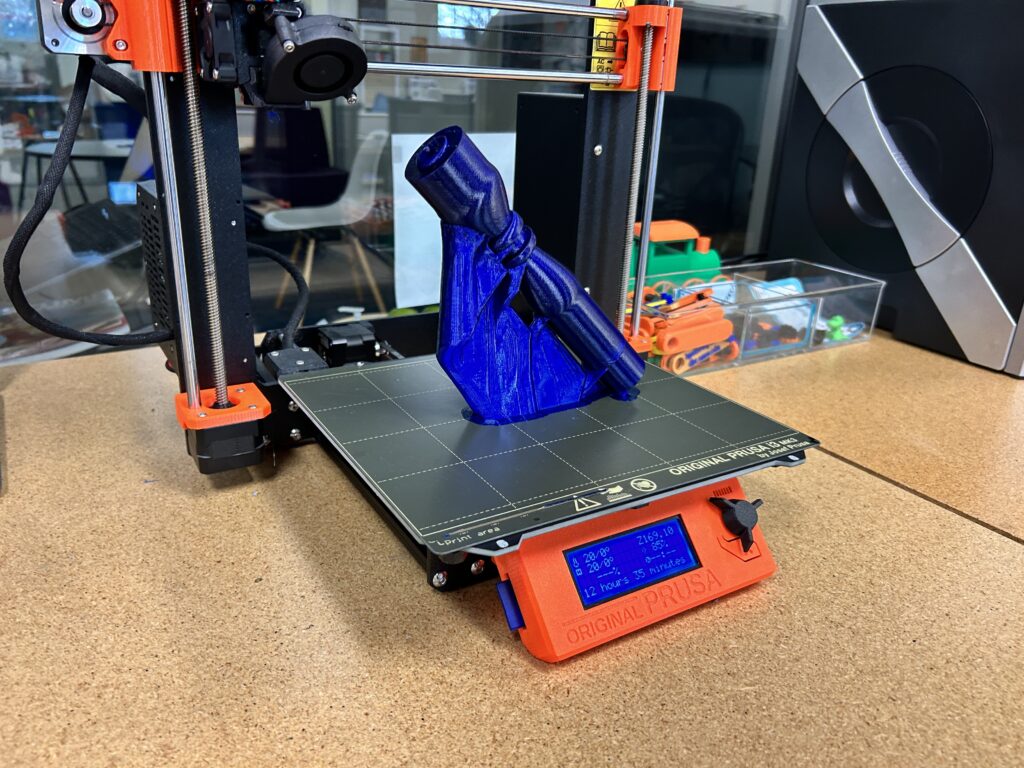
    To tie back to my previous post, I was printing those 5 pieces together at once. (the Photochanter shell, the bass drone middle, and the three stocks, one for each drone)

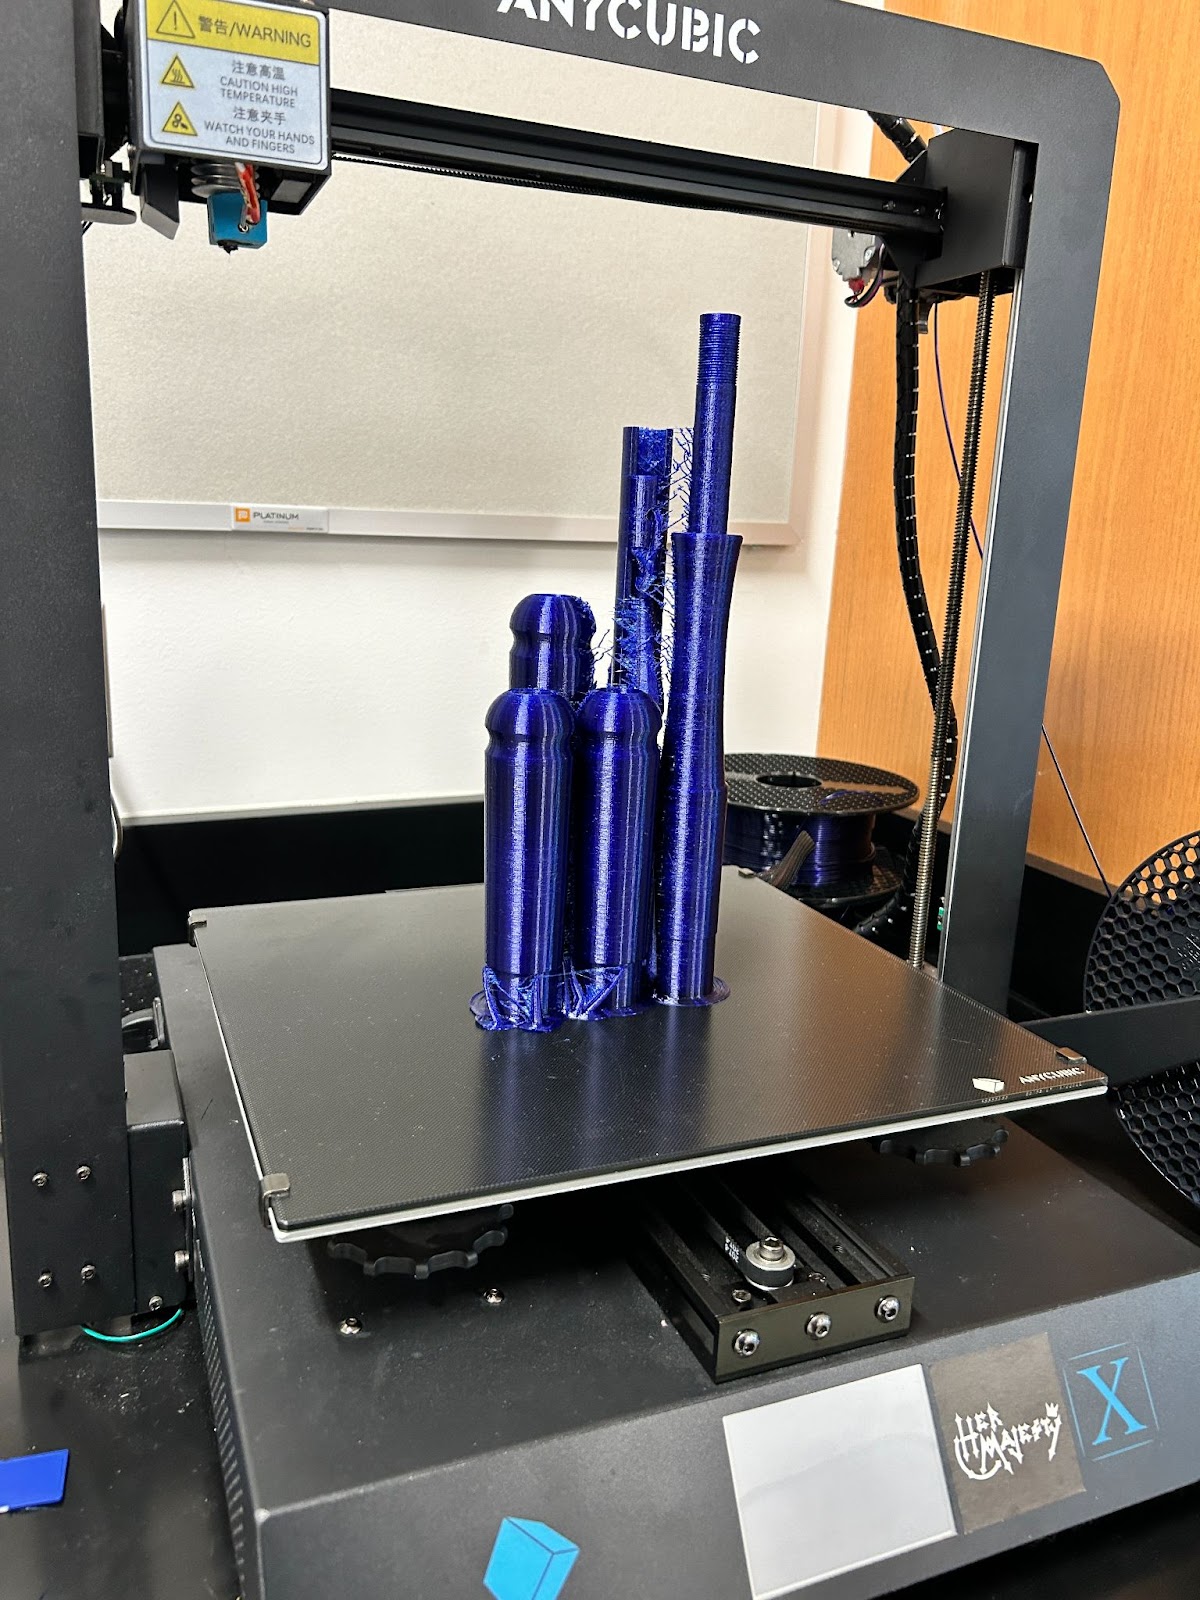
    Those came off the printer beautifully… for the most part. The Photochanter shell looked great (and worked great, after having assembled all of the electronics) I’ll include two quick photos of that below.

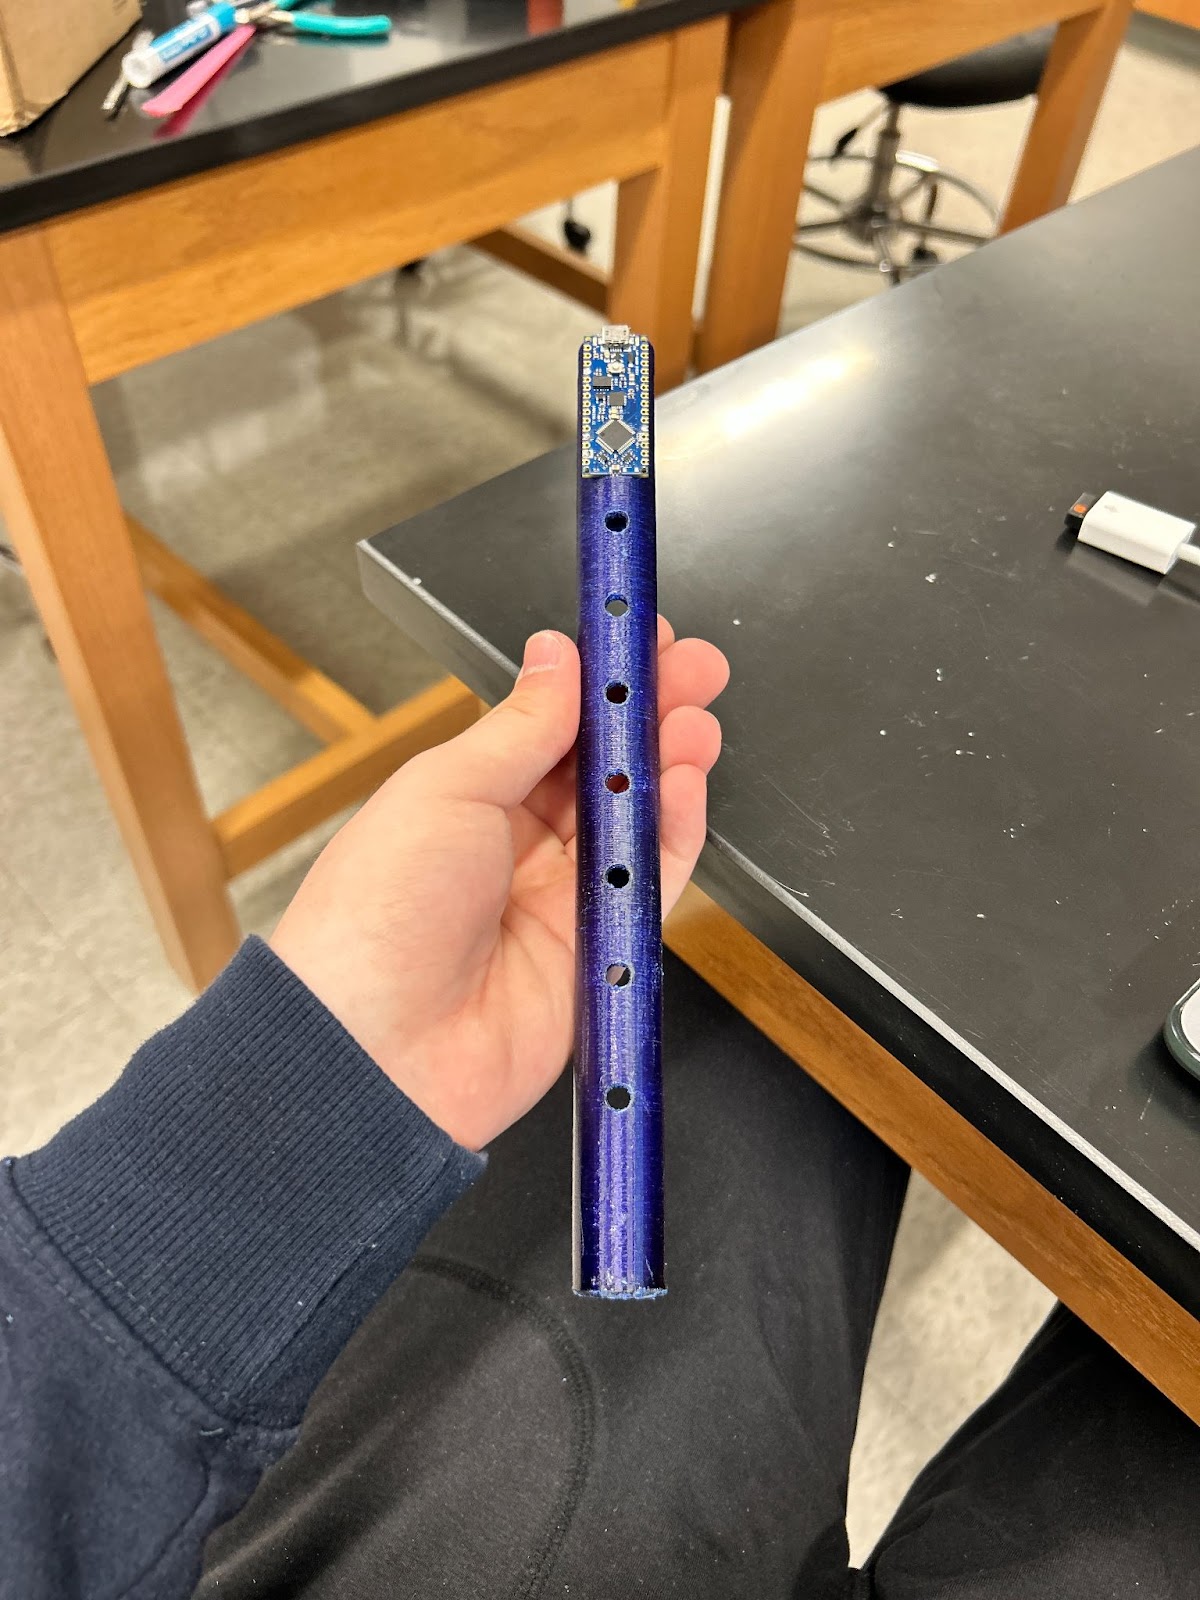
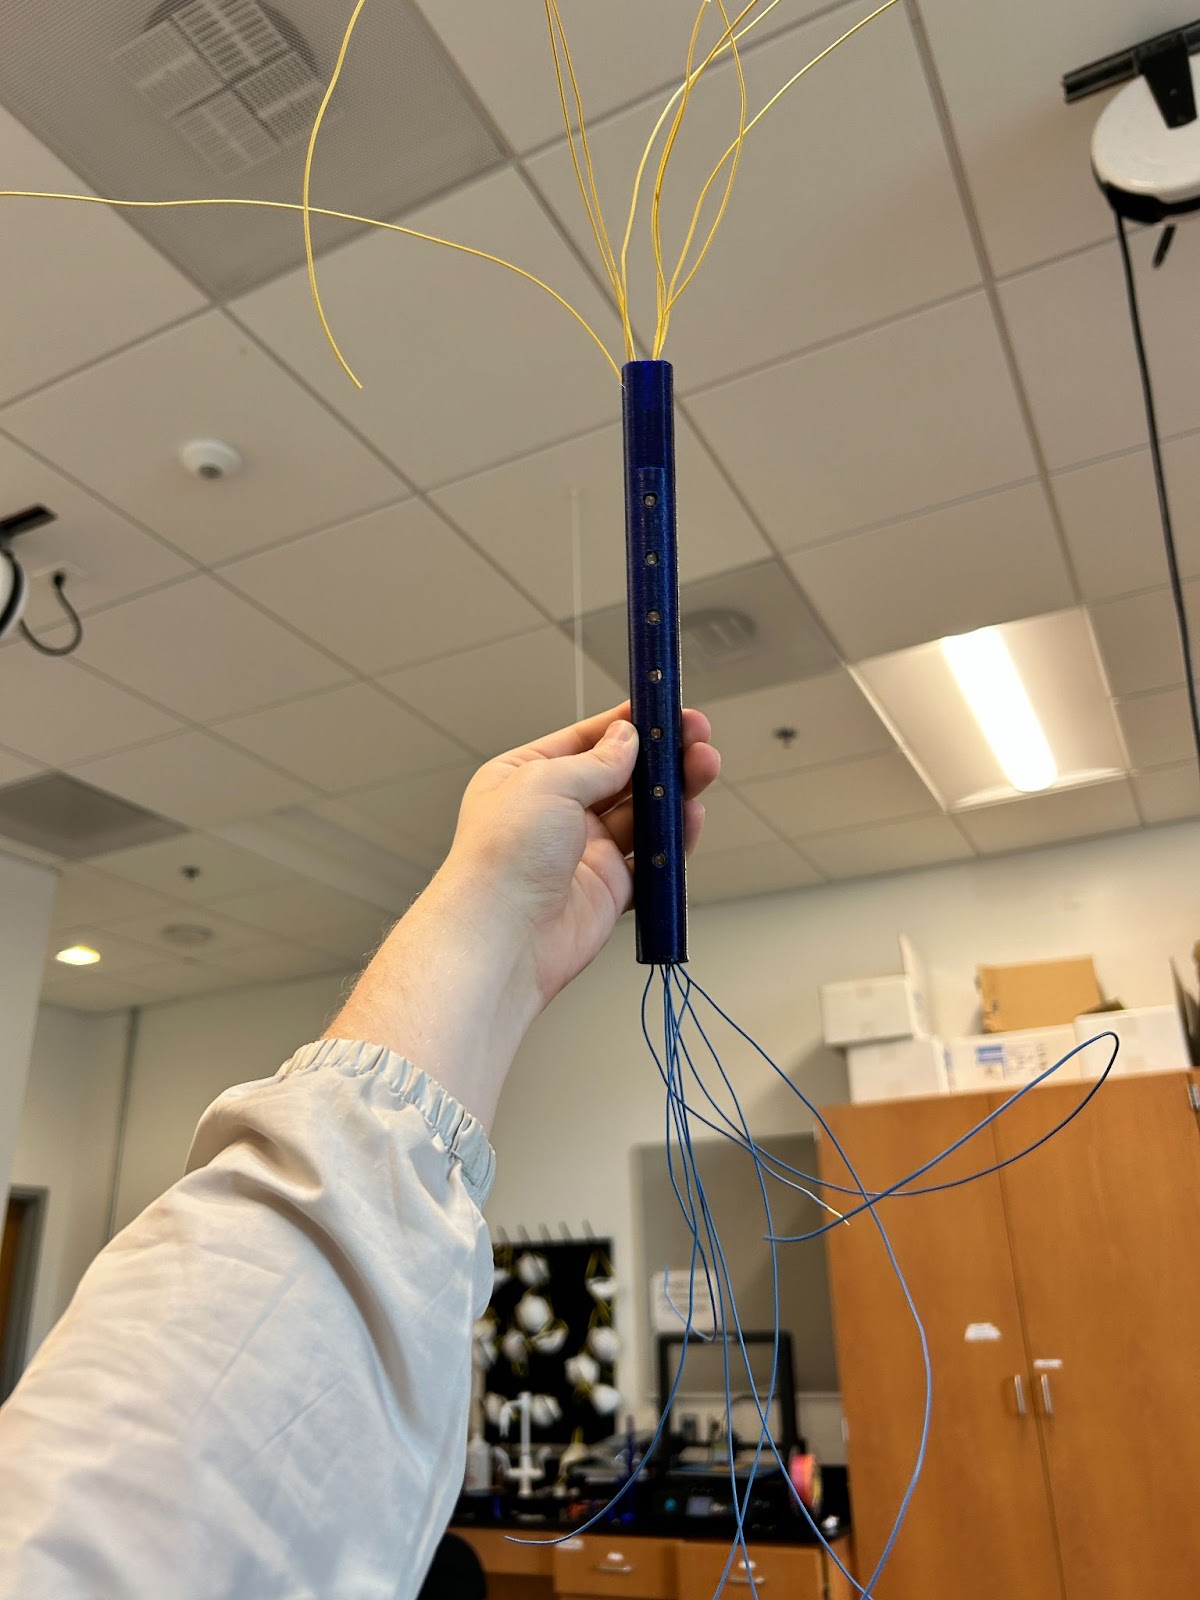
    This project was so enjoyable, and once I got all of the photoresistors in there, it worked surprisingly well. I ended up not using the Arduino Nano, and just plugging those loose wires into an Arduino Uno from the electronics lab. During the presentation, I realized that I had calibrated the photoresistors to the light intensity in the electronics lab, and not the spotlights in the Seacobeck concert hall, which caused some problems. However, once I had a classmate stand up with a flashlight, all was well!

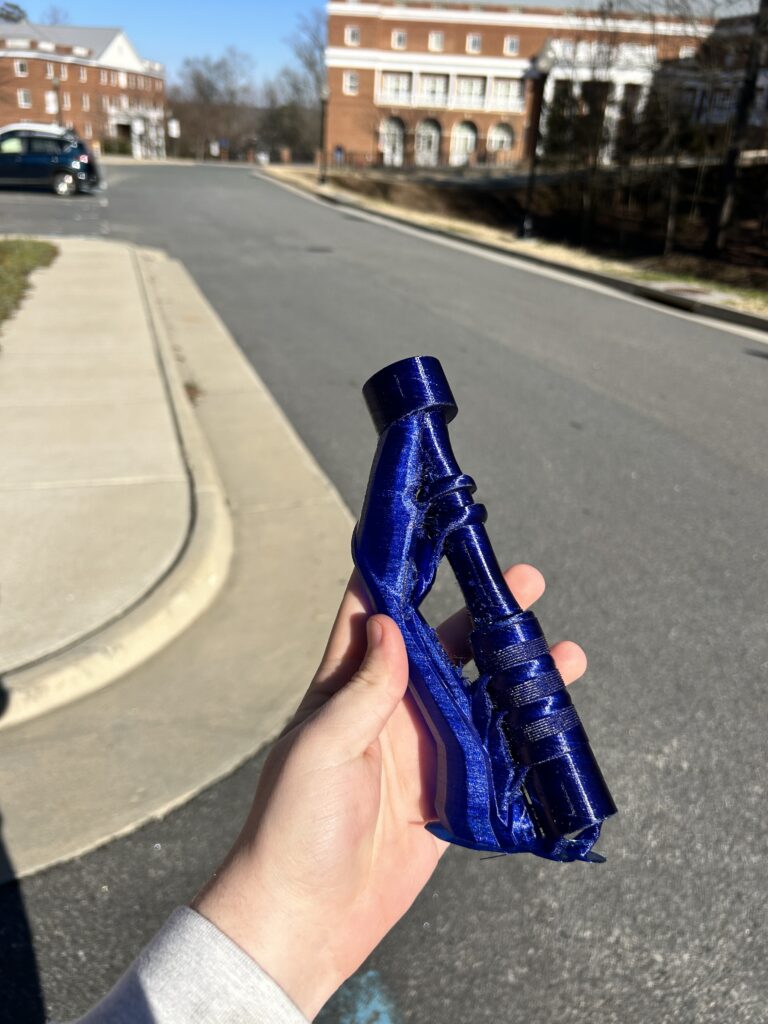
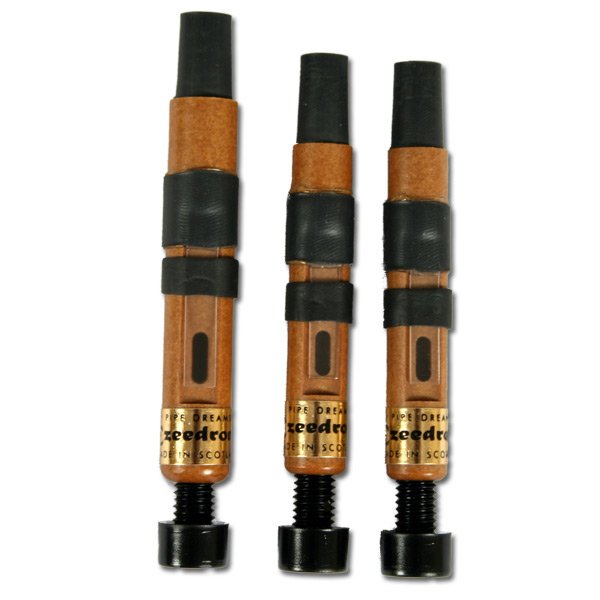
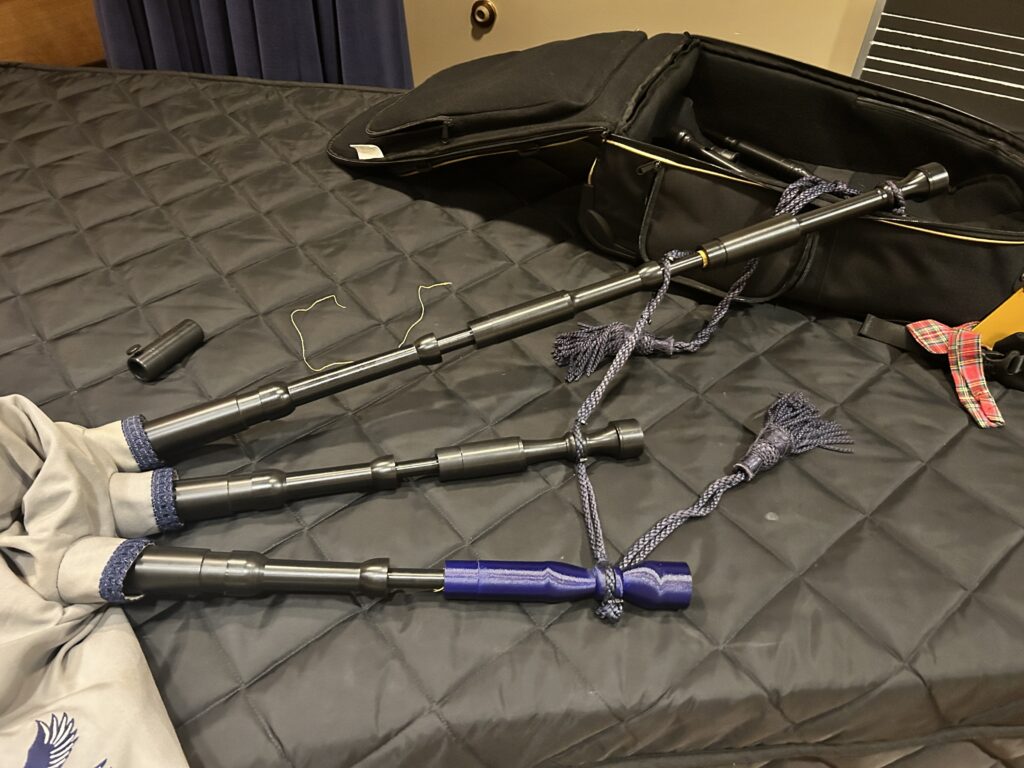
    This is not necessarily related to the project, but it is still 3D printed, and bagpipe related, so I figured it was worth including lol

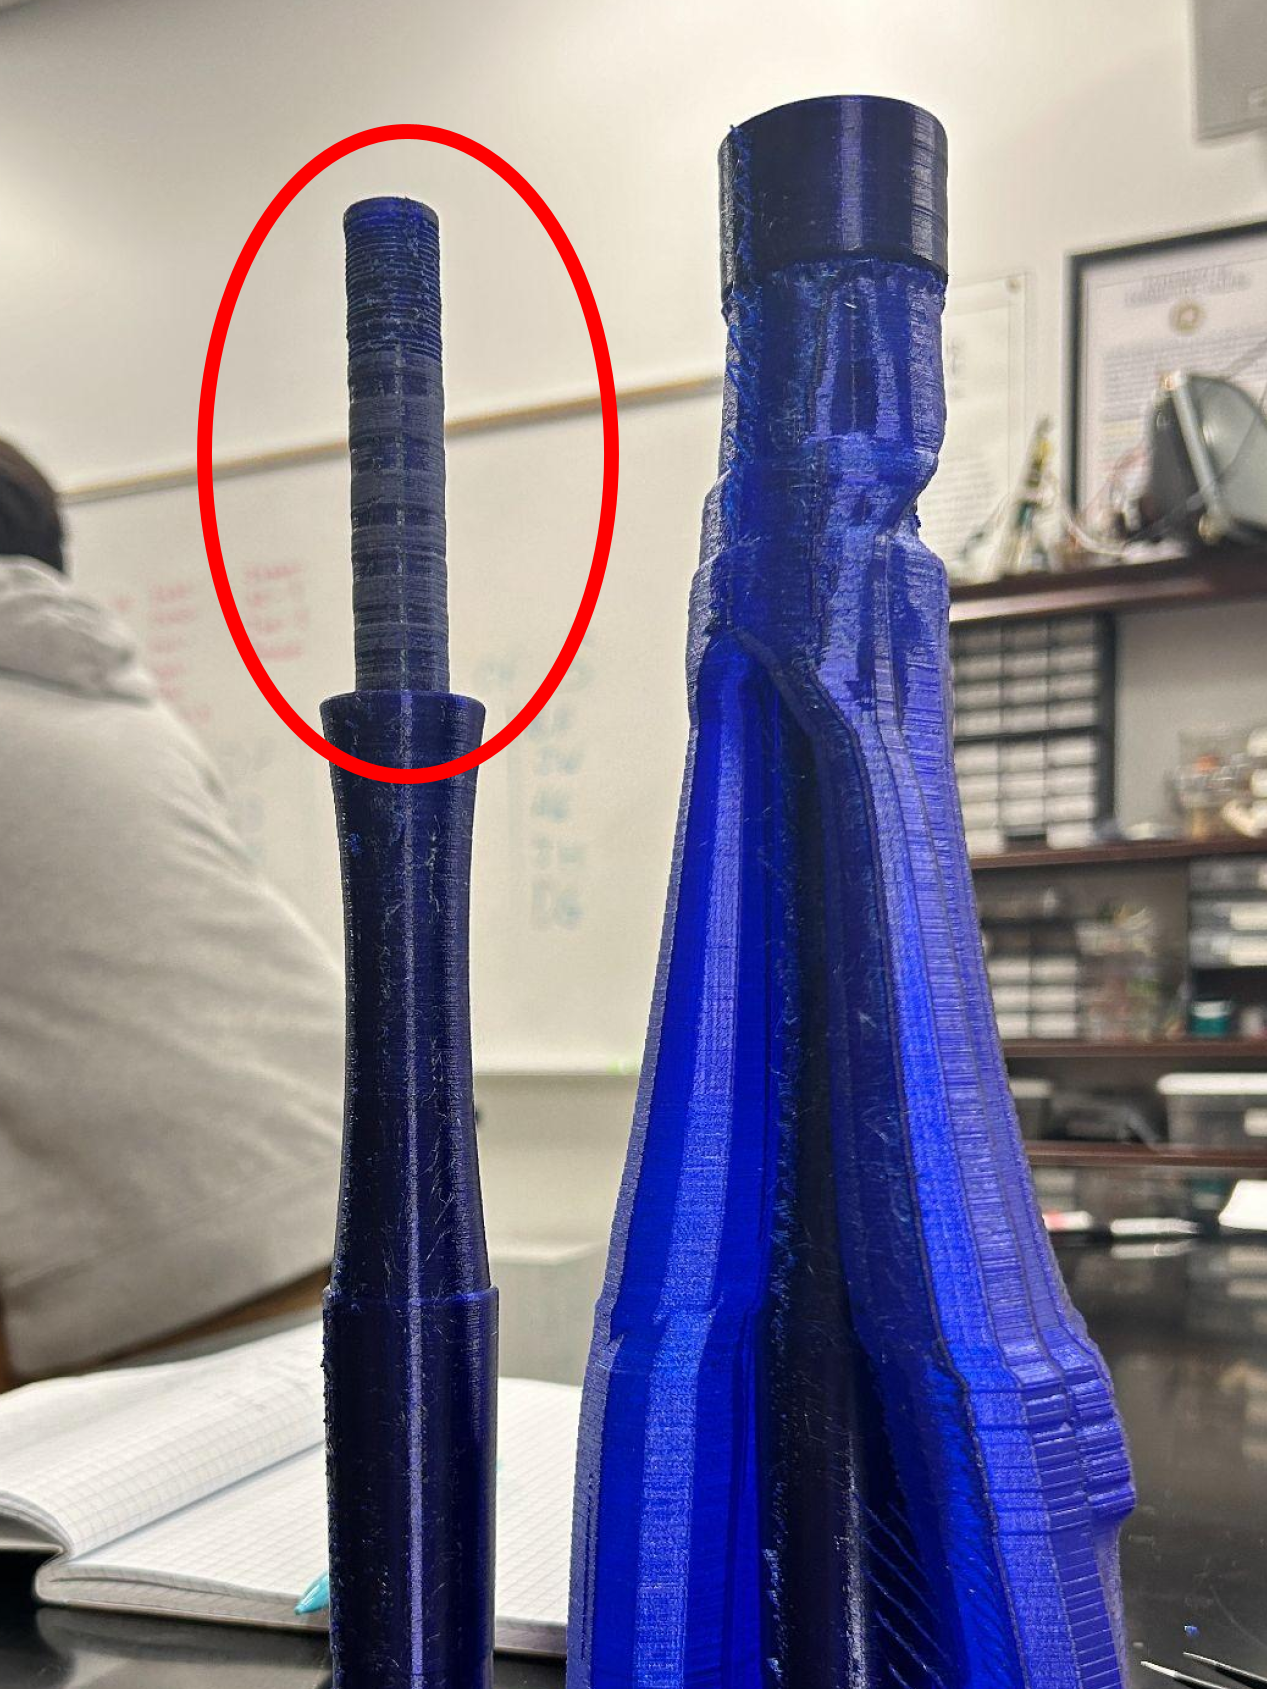
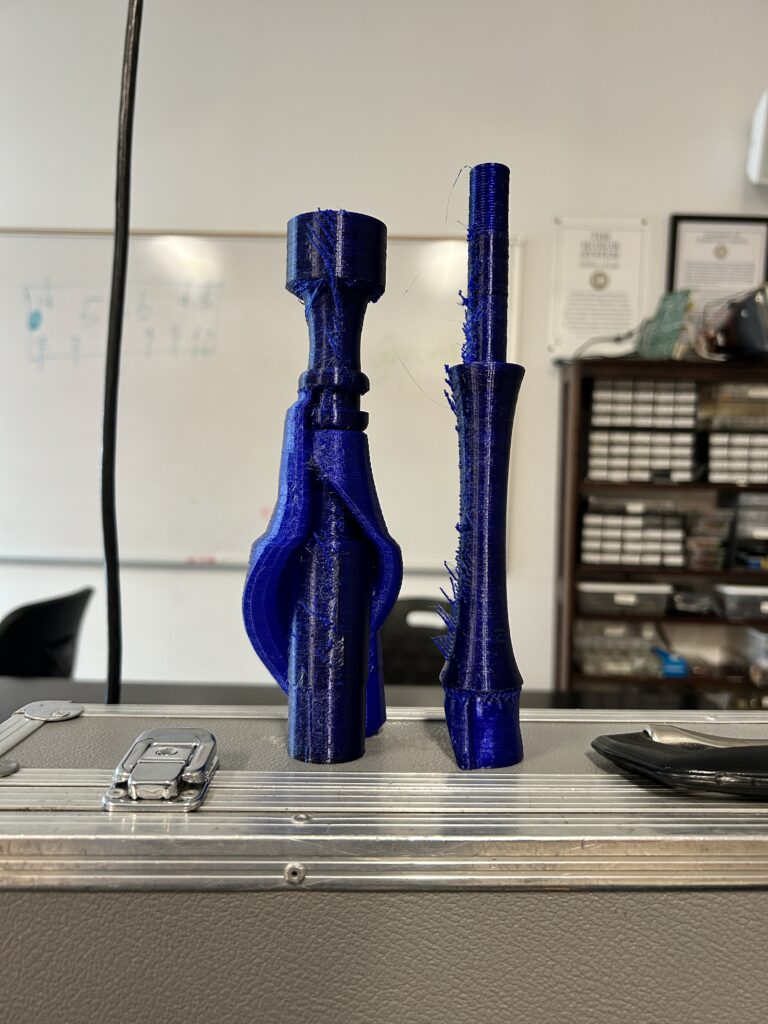
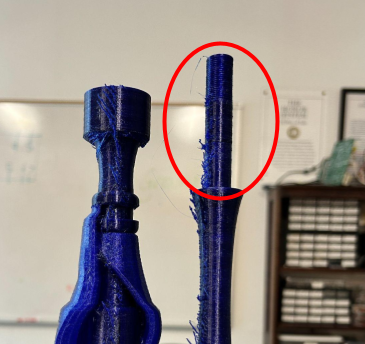
    ANYWAY back to your regularly scheduled programming. As you might be able to see in the above picture of the 5 pieces on the printer- the bass drone middle was a little wonky when it finished; the same issue I had before with the layer shifting toward the top. I’m starting to believe that it might just be the combination of an older printer, and a tall, thin print. Still not sure why it works sometimes, and fails others. Adding to for future research!

    After pulling those off the printer, I started the chanter stock and the bass drone bottom on Rebecca’s printer. Then, with my 3 stocks in hand, I made my way over to the DKC and officially started the assembly of the pipes. (This was April 21st for some perspective)

    I struggled to pull the stocks through the gaskets on the bag, but that’s a regular struggle with the bagpipes. It was marvelous to see this bagpipe bag with three blue stocks sticking out of the top.

    In the next day or two, I was able to pick up my chanter stock and bass drone bottom from Rebecca’s printer. Once again, the bass drone bottom has the same layer shifting issue that I had encountered before with the bass drone middle. I was bummed, as that was the last piece I needed for my presentation at Research and Creativity day on April 26th. I would have had time to print another, but other students were using the printers for their final projects as well.

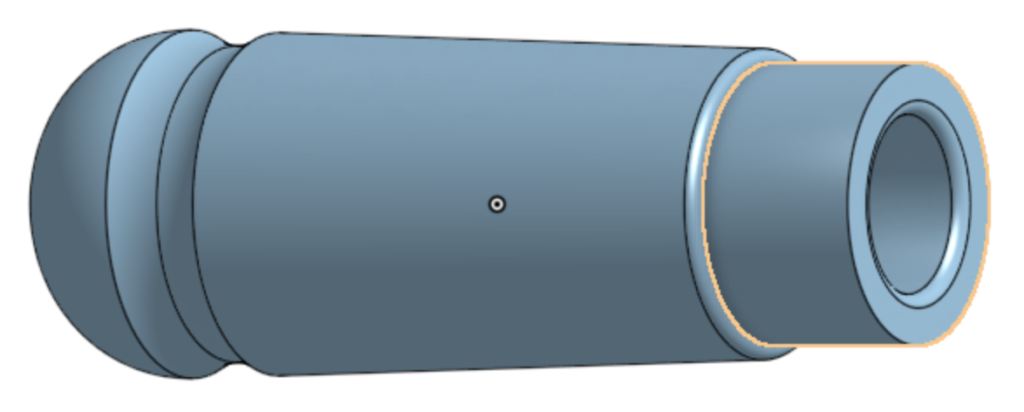
    So I shambled back over to the DKC, and attached my chanter stock with the included hose-clamp, and then installed my blowpipe split-stock. For context, a split-stock is similar to a regular stock, in that it connects your blowpipe directly to your bag. However, a split-stock has a built in water trap, meaning that all of the piper’s spit gets stuck in a tube instead of falling into the bag. Yeah… real good stuff.

    As I had nearly every piece completed, I replaced the wonky bass drone bottom with my personal, polyoxymethylene bass drone bottom, and committed to showcasing the “almost ENTIRELY 3D PRINTED BAGPIPES” at Research and Creativity day.

    The presentation went so well- I was throwing together a slideshow the morning-of, and then took the last 10 minutes to set up my room in the HCC. I was SO glad to see some familiar faces in the audience; Cartland and Shannon, a few of my professors, the Chair of the Music Department, and the Dean of the College of Arts and Sciences!!!! (and a few close friends that I would be remiss to not mention) I couldn’t have been happier with the turnout, and everything came together really well. The pipes did not cooperate during the demonstration, but it was evident that they worked, which is all I could ask for.

    I’ll include a few photos below!

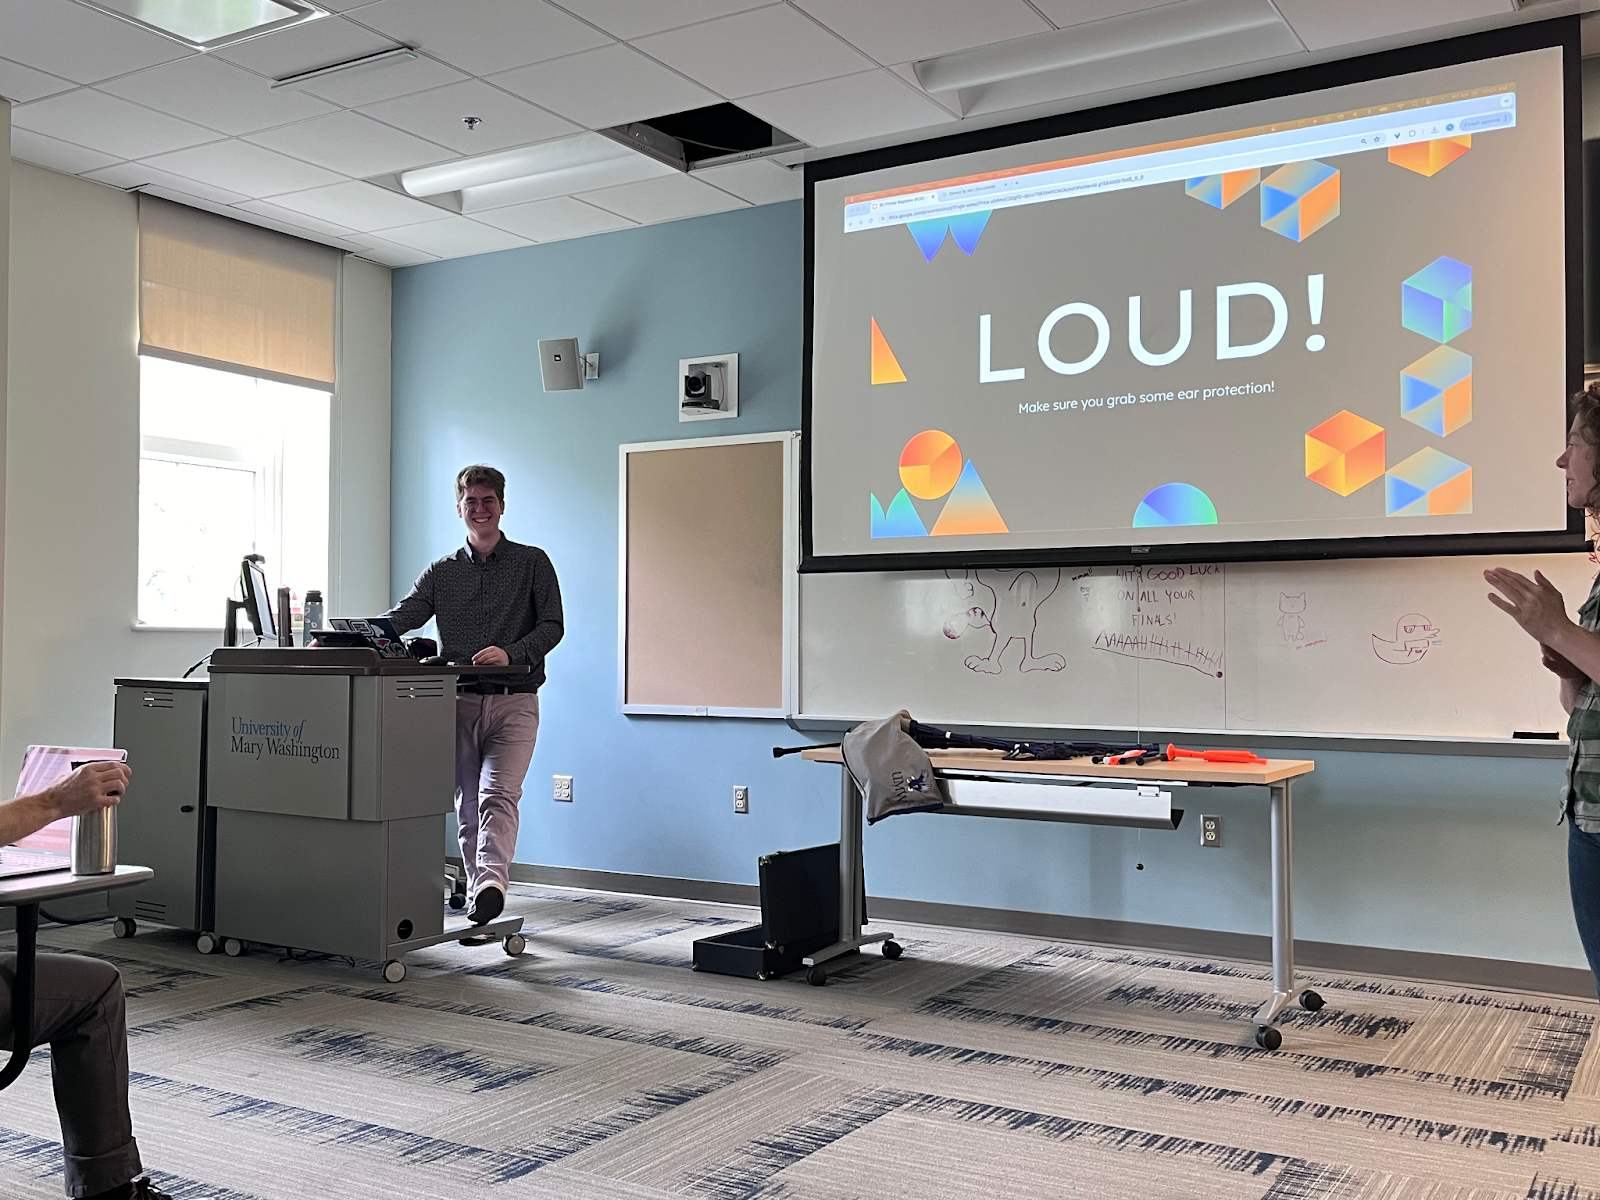
    My opening slide, mentioning that I brought some earplugs for those who wanted them.

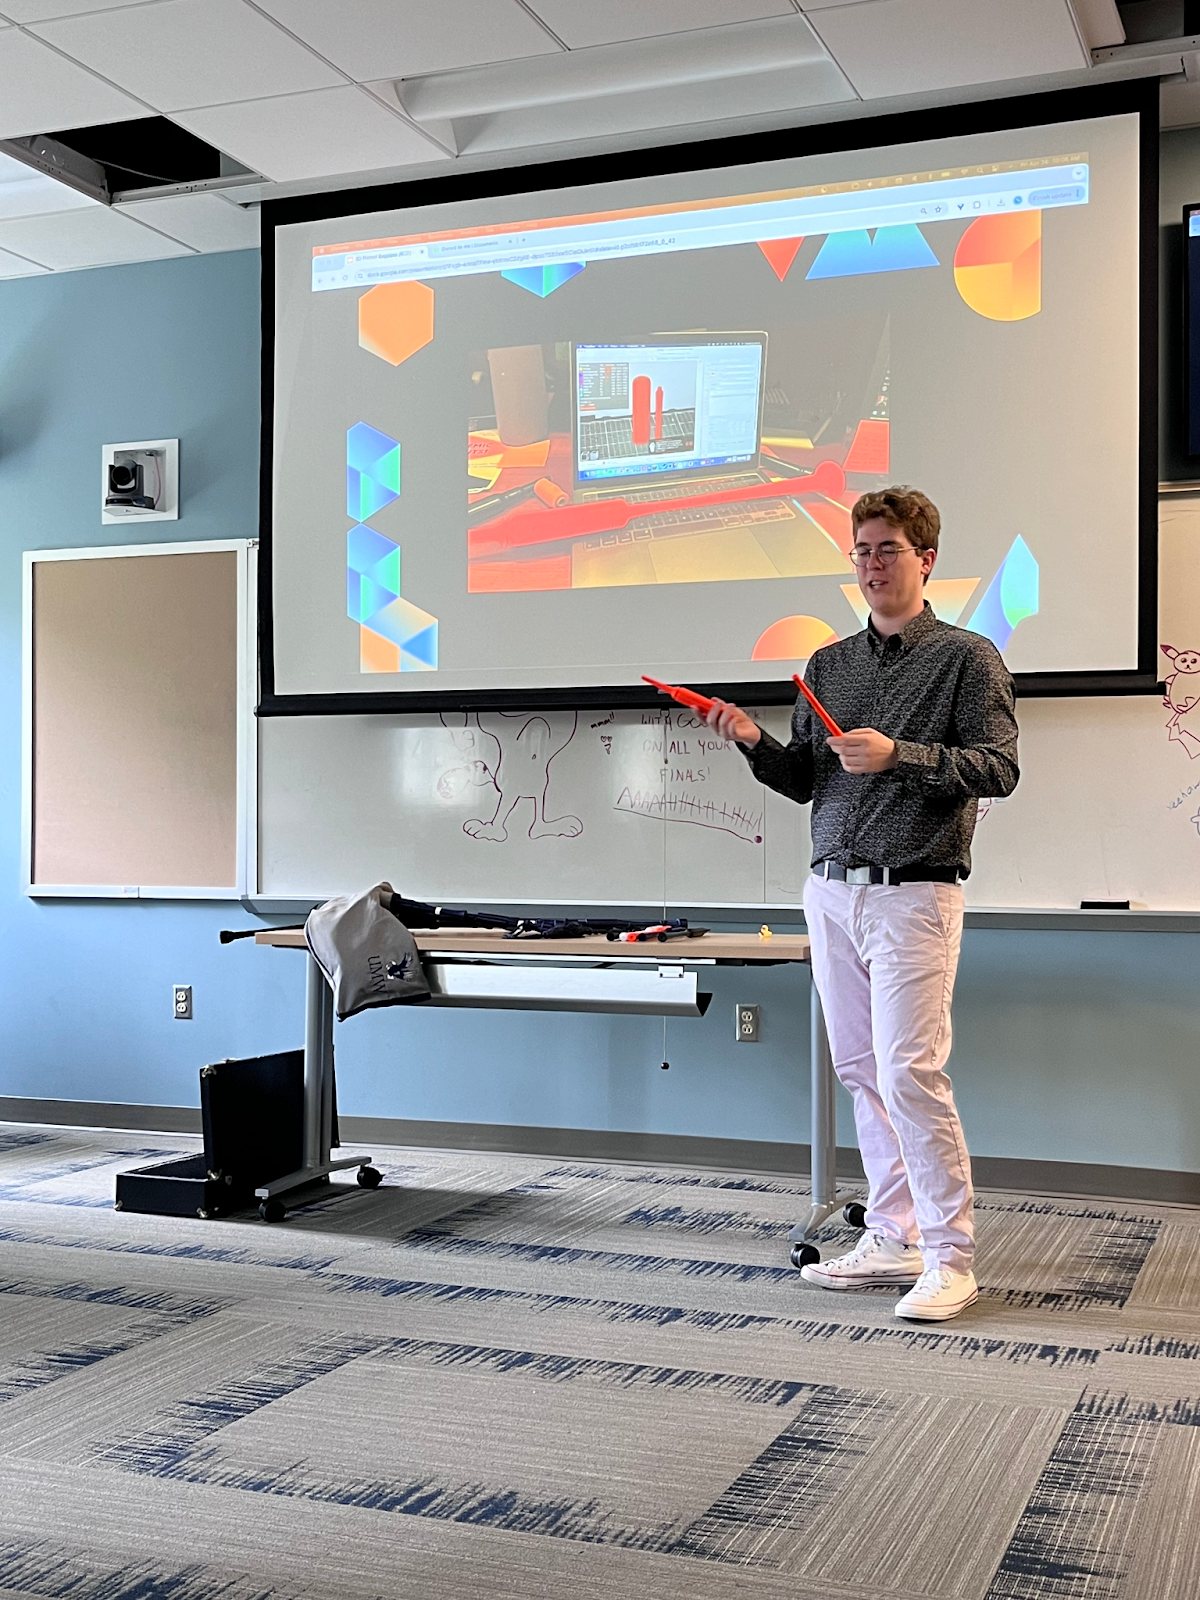
    Don’t look at my face, thank you 🙂

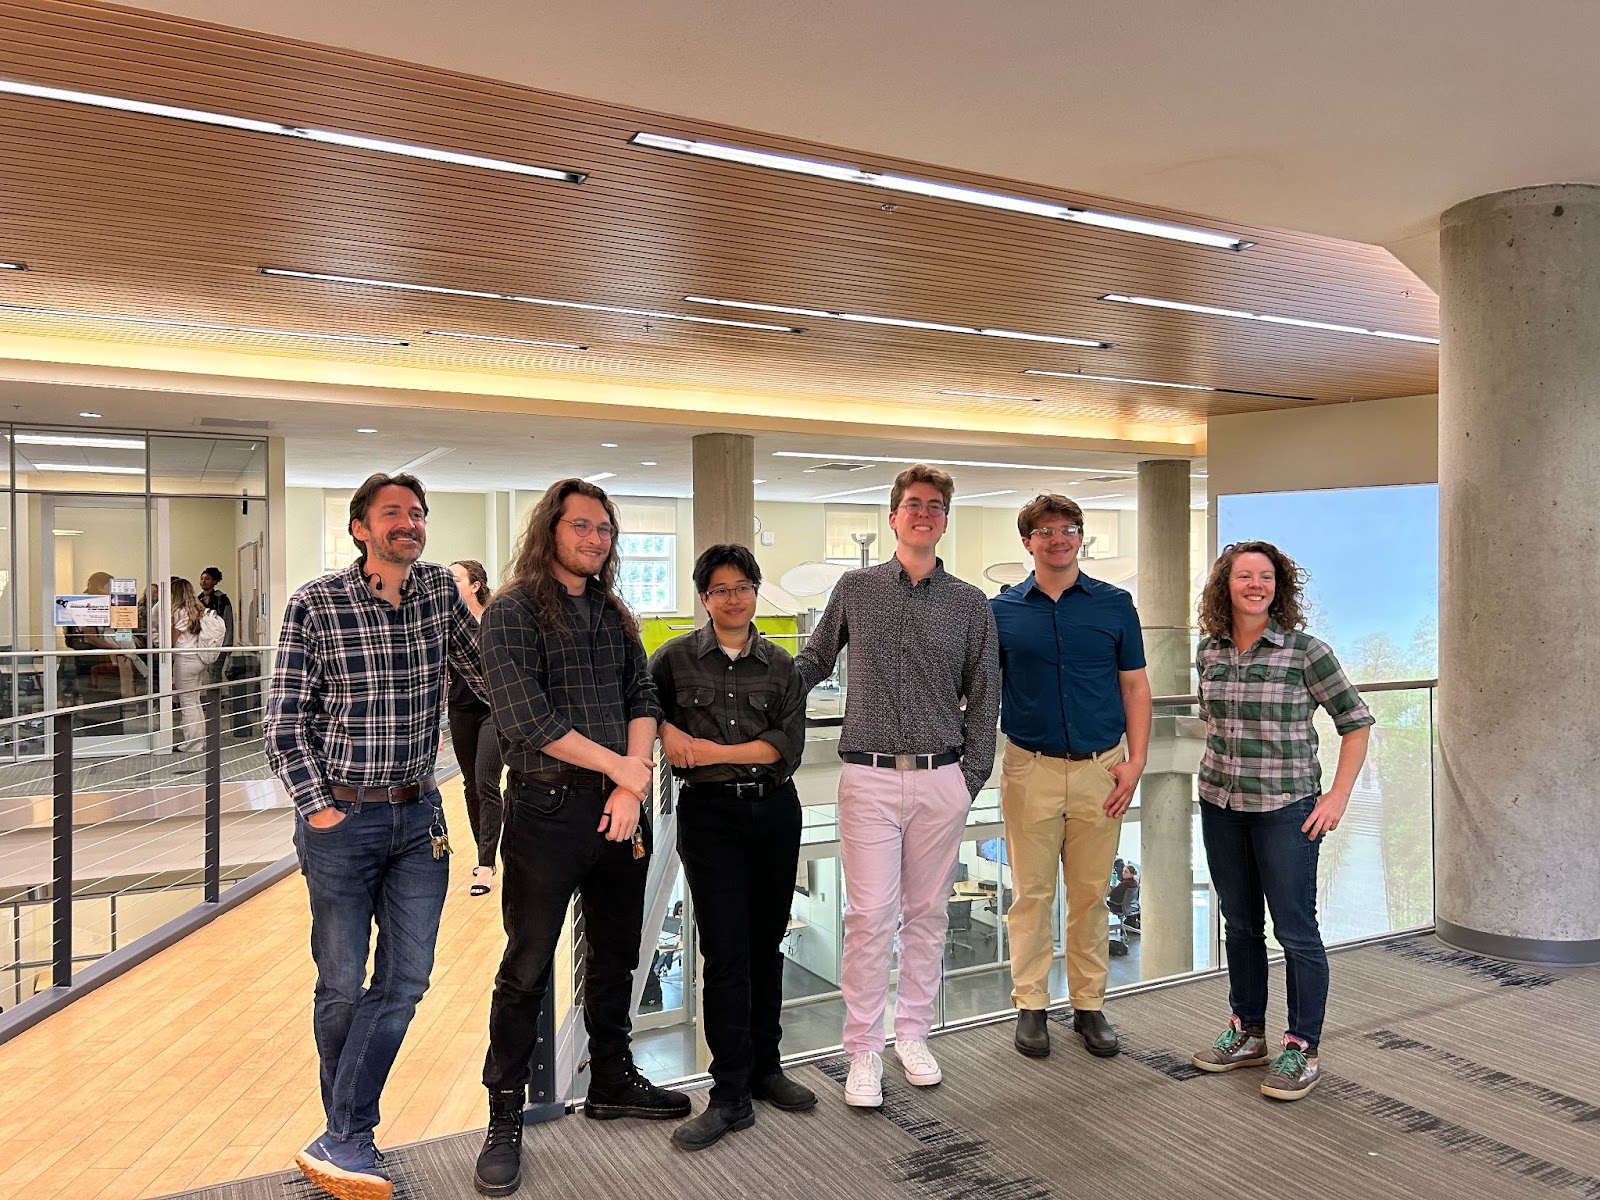
    This photo includes the four students who have been working with the DKC on different fellowships. Cartland on the left, Shannon on the right, and the four of us in the middle (left to right) are Liam Kiely, Eugene Hlaing, myself, and Boone Fleenor! Liam and Eugene were working on their own webcomic, and Boone was building a water flume from scratch.

    ANYWAY!!! I have been playing with the pipes a bit since Research and Creativity day. Shout out to Olivia Corcoran for putting up with my taking over of EPB practices; she’s given up quite a bit of practice time to help me work out the kinks in these pipes and I am so grateful. They work well, they’re just either too easy or too hard to play, and that gray area in the middle is so slim that I have not found it yet.

    Update: I am headed to the Vocelli’s patio right now (Thursday, May 9th, 2024 at 9:00am) to try to find out how I can make these a bit more consistent for Saturday!!! Commencement is coming up quickly!!! Two days til graduation AHHHHHHHHH BYE

    Update 2: It is currently 10am on May 10th, 2024! Yesterday morning, I spent a good bit of time working on the pipes; I swapped out reeds a couple of times, trying to find the best combination that would stay consistent for commencement tomorrow. I think I did it!

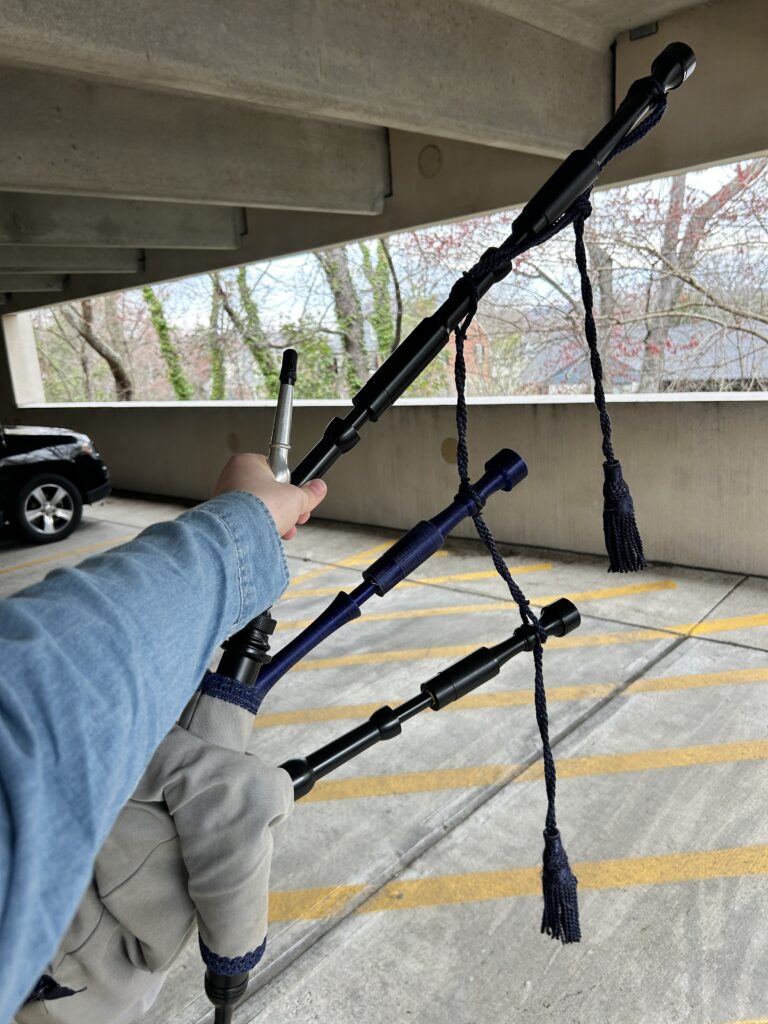
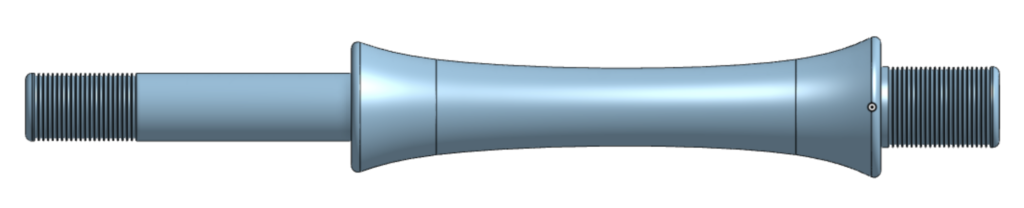
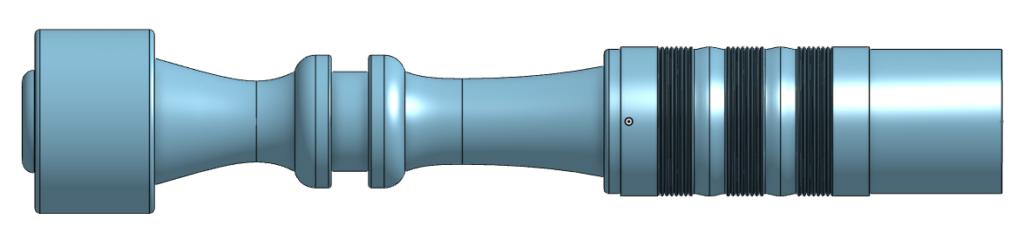
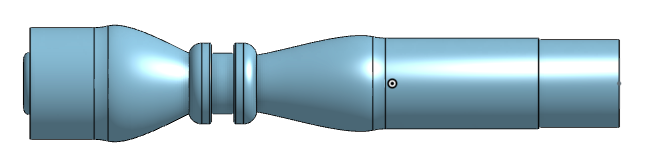
    I’ll include one more blog post after commencement with a few photos and videos, and a bit of a conclusion to the project for now, but I also just realized that I haven’t included a photo of the full pipes yet. Here you go!

    FAREWELL!!!!!!

  • Late post (I wrote this on 4/19/24 but the site was down so I did not post it LOL)

    Hello!!!!!!!!!

    It has been 2 weeks of BIG PROGRESS!

    To begin, I printed off that top section of the middle piece of the bass drone, and it came out looking perfectly fine, which is what I expected. 

    I still do not know what caused the error the first time, but I am currently reprinting the middle of the bass drone along with a few other pieces which I will showcase below.

    In the image above, you can see a few different pieces. On top of working on the middle of the bass drone, I finished modeling the stocks, which are the parts of the pipes that are permanently attached to the bag. I decided to add a bunch of parts to one buildplate so I could get rolling on my last few prints. Above, I have my 3 stocks (one for the bass drone, two for the tenors), the middle piece of my bass drone, along with the 3D model for my “photochanter”, which I’ll be printing and adding some electronics for my final project in Electronic Instrument Design.

    That was a mouthful of a paragraph. Point being, I only have two pieces left to print, both of which I modeled today. These are the bottom of the bass drone, and the stock for the chanter. Cartland and Shannon purchased a blowpipe and blowpipe stock, so I don’t have to worry about printing those.

    Below, you can see my final two models! (don’t let that exclamation point fool you, I am very sad)

    I’m going to get those on the printer now! UPDATE SOONNNN!!!!

    BYEEEEEEEE

  • Bass Drone Troubles (and Other Troubles)

    HELLO! Time is flying!!! I have done a lot in the past few weeks, and not all of it has been sunshine and rainbows, unfortunately.

    Within the past 2-3 weeks, I printed off a second tenor drone (both top and bottom) and for some reason, the drone doesn’t sound correct. I’m not able to get the normal tenor drone sound, and instead, I get a higher pitched warble, which I have not heard before. I attempted to sand the inside of the piece that was giving me trouble (the bottom of the drone, as the top was working fine with I combined it with the first bottom that I printed), and that did not help very much. I will be reprinting another bottom asap! (and hoping it works as well as the first one lol)

    In other news, I also finished up my bass drone top and middle models and got them on the printer. The modeling process was very similar to modeling the tenor drones, as I had suspected. I’ve included the images below!

    I was able to get these both on Rebecca’s printer at the same time last week, and had them printed off Wednesday, April 3rd. When I got to class, and saw them on the printer, the middle of the bass drone (the piece in gray) looked a bit strange.

    As you might be able to see, there was some strange ribbing/layer-shifting toward the top. I had initially thought that it could have been wobbling a bit from the movement of the bed, but the top of the drone (the print on the right) looks perfectly fine, which was even more strange. Because of this (and a small error in my model, but not big enough to cause too much trouble), the pieces did not fit together. I attempted to sand down the ribbing as best as I could, and the result of that process is seen in the picture above. I eventually was able to fit the pieces together, but it was still a tight fit after 30 minutes of sanding.

    I took both of the pieces to practice that night and gave them a try, but we’re in crunch-time for our competition at the end of this month, so I didn’t have much of an opportunity. I was able to confirm that my 2nd tenor drone wasn’t working well, both in and out of the pipes, and the bass drone was not cooperating either.

    I contacted a friend of mine, Zachery Bingaman, who I’ve mentioned a few times in these blog posts. I was curious if he knew what went wrong with the top of the middle of the bass drone. (it is hard to describe these pieces without a jumble of words like that lol) He was stumped, but he guessed it wasn’t a printer issue, but rather something that went wrong in the modeling or slicing phases. It looked perfectly fine on my end, and he suggested I chop my drone down to just the problematic area and give that small portion another shot on the printer.

    I’ll be printing this off today, and hoping it goes well! I will update later today or tomorrow. In the next update, I’ll hopefully be able to say that I have all of my models complete! I’m currently putting together the bottom of the bass drone, and then the three stocks will be super quick to model. (and hopefully super quick to print!)

    More soon! BYE!

  • BIG UPDATE!

    HELLO!!!! It has been quite a white since my last update. (Midterms hit like a truck!)

    While I was home on Spring break, at the beginning of March, I put an hour or two each day into finishing up my models. I finished off the tenor drone entirely, and then I focused on the bass drone. I refined the top a bit more, and began sketching out the middle.

    As for the tenor drone, I had mentioned in the last update that we had to pull it all the way out to get it to sound decent. I widened the diameter a bit, and removed the beading and combing, as I have already mentioned. I decided in that moment, in late February, to take a more modern approach to my pipes: I curved the bottom of the tenor drone, and added a slight narrowing to the top of the tenor, just to make it look a little wavy I suppose. I am unsure if this did anything to the sound, but if so, it was nothing notable.

    My plan was to use the print lab at Moravian University, in my hometown while I was on break. I brought home my PETG and everything, but their large-format printer uses 2.85mm diameter filament and our’s use 1.75mm, so I was out of luck. I DID use that time to experiment with their scanner, and my friends and I scanned each other’s heads into STL files LOL

    When I returned to campus, my first week back was insanely busy. I had lots of assignments due, but I managed to get into Jepson and print the first entire tenor drone off of Rebecca’s printer (both the new top and the first iteration of the bottom). The Eagle Pipe Band was performing at 4 different locations over the St. Patrick’s Day weekend, and I figured it would be the perfect test for the tenor drone.

    When they came off of the printer, on March 15th, they were a bit stringy, and required the same sandpaper-wrapped-around-a-screwdriver treatment that I gave to the first print.

    After cleaning these two piece up, I ran (literally) to the DKC to grab one of the new drone reeds that Cartland and Shannon had ordered, so that just in case this print didn’t work, I wasn’t messing with MY pipes right before St. Patrick’s Day. I drove to the Alvey parking deck on campus, put everything together, and gave them a go.

    As you may be able to tell from the title alone, this was a riveting success!!! The tenor drone stayed on the pipes for bagpipe practice that night, ANDDD at every single performance throughout the St. Patrick’s Day weekend (we played for probably 3-4 hours total).

    The only thing that worried me was, because I printed both piece straight up-and-down, the layers ran perpendicular to the thin part of the bottom of the tenor. It’s a little wiggly, and I’m not so sure how I feel about it (this is the part that we’re always adjusting to tune the drone). I asked the other pipers to be gentle lol. I don’t know how to approach fixing this, as I’m going to sacrifice the clean exterior if I angle the print, which is allllwayssssss a struggle.

    However, the drone has been banging around in my case for a few days now, and still looks and sounds fantastic, so maybe it isn’t too much of a worry. I could find a way to increase the infill density halfway up the drone, possibly? I know that 3D Gloop is also a thing, which is a “glue” that can be applied to prints, and it will chemically bond pieces together. This might help to just secure the layers a bit more, but this is probably a last resort.

    Today, I’ve spent a bit of time ensuring that my bass drone top matches my tenor drone top as much as possible- I can somewhat confidently say that the bass drone top is ready to be printed. If my second tenor drone is done, I might go ahead and get that started today! I just need to finished up the middle and bottom of the bass drone, and then the three stocks will be super easy. It may be a bit tough collection measurements for those, as I am not necessarily sure that I want to take them out of my personal bagpipes, but I will do what I must!

    In early April, I’ll also be doing a workshop on creating a custom box for your DnD dice! I’ll be able to dive into some more complex aspects of 3D modeling with Onshape, so that’ll be fun!!!!! WOOHOO!!!

    More updates soon! BUH BYE!

  • Tenor Drone (Nearly Complete)

    Hello!!!!!!! I have lots to share, so buckle up!

    I’ve been focusing on the bell of the tenor drone. The bell is the space inside the top of the drone that acts as a resonating chamber, amplifying the sound. It is essential to ensure this part of the process is not overlooked, as the drones won’t sound correct with a misshapen bell. You can see the shape of the bell, and where it sits within the drone, below!

    A large part of this project is softening the hard angles of the interior of the pipes. I’ve been adding small fillets to each 90º angle, just to slightly take the sharp edges down. I’ve included another picture of the entire interior of the tenor drone below. This is an image of the shape that is removed from the overall top of the drone.

    I also decided to remove the beading and combing from the drone. Though it looks great, and I may add it back later, it was causing a bit of trouble when I was adjusting the shape of the piece.

    Speaking of adjusting the shape: I printed the top of the tenor drone last week on Rebecca’s Anycubic Mega X printer in Prusament PETG. The supports were a bit tough to remove, and I ended up having a rough looking part, but I was hopeful for how it sounded.

    Because I printed it a 45º, in hopes it would add to the durability, the inside of the drone was a bit of a stringy mess. I used a heat gun to melt some of the strings back down, but it was still messy and I was nervous it would affect the sound. I asked around for advice; Cartland and I were looking for cylindrical and curved files, to smooth out the rough parts of the interior. I figured that was the best route, so I decided to head over to Harbor Freight.

    On my way, I stopped by Jepson to see if Rebecca had any ideas about cleaning out the inside. We ended up taping some sandpaper around a screwdriver, and it worked well! Sometimes it is the janky things that work the best (and the quickest).

    I took my shiny new drone to bagpipe practice this past Wednesday, the 21st. We gave it a try, and it was giving me the same warbley sound that the first iteration was. My pipe major, Olivia, along with myself and Rebecca were working on it for a bit, and we eventually got it sounding alright. We had to pull the drone all the way to the end of the tenon (the bottom half of the tenor drone), and it was hanging on by a hair, but it worked! Olivia and Rebecca speculated that this could be happening because the interior diameter of the drone is too narrow by a minute amount, or that the infill density is too low.

    My reshaping of the tenor drone today included widening the diameter ever-so-slightly. I will print it off next week and see what happens.

    I finished up today with putting the finishing touches on the first model of the tenor drone bottom. I used the same technique that I did for the beading and combing for the spot that the hemp will be wrapped around. This will make more sense later! I’ve included a picture below!

    I’ll print this off next week as well, and hopefully we will having a fully-functional tenor drone!

    Later!

  • Huzzah!!!! New printer!

    Hello! I am writing to you from room 461 of the Jepson Science Center, wherein I have been calibrating and testing Rebecca’s Anycubic Mega X large-format printer for the past hour or so. I wasn’t able to print on it last week because someone ran away with the SD card that had the calibration gcode file on it, but I am now printing “owl_pair.stl”!

    When I started the print for the first time, the extruder was pretty far from the bed, but I didn’t know that at the time, so I consulted my 3D printing friend from Pennsylvania. He informed me that the culprit was most likely an unleveled bed.

    I had never really manually leveled a bed before, as the PRUSAs in the DKC calibrate themselves. It took a few minutes, and numerous Google searches (numerous = 2 Google searches), but I found a video that walked me through leveling Anycubic printers.

    I stuck a piece of paper under the extruder nozzle, and raised the bed until the paper was pinched between the bed and the nozzle, as the video instructed. I did this on all four corners a few times, and then started the print. 30 minutes in, the owls look pretty cute! (Well the logs they are sitting on do, at least.)

    I’ll be back in on Friday to HOPEFULLY begin printing off the 3 pieces of the drones I have modeled. Wish me luck!

  • Drone Tops (Nearly Done)

    Hi there! It’s AJ again!

    Today, I spent a good amount of time finishing up, and refining, the beading and combing on both the Tenor and Bass tops. Hammering this out now is going to make the next few pieces 10x easier. (now that I know what I want them to look like, it can be a LOT of copy/paste)

    I may add more to the thinner part of the drone, but that will be a bit more complicated, as you can see in the photos below, it curves a bit. I’m sure with a bit of diligent work, and a few more hours devoted to learning OnShape’s intricate tools, I could figure it out.

    This won’t be my last blog post of the semester, as I still have yet to print this pieces, clean them up, and test them next week at UWM Eagle Pipe Band practice.

    I am incredibly pleased with how these look so far, and I have high hopes for their functionality as well.

    More to come!

  • Bass Drone Top

    Hello again!

    Over the past few weeks, I’ve been working on stretching out the tenor drone top model into the bass drone top. I figured this would be easy, because as I mentioned, I thought it was as simple as just stretching out the tenor drone top to the length of the bass drone top.

    This was not the case…

    I struggled to figure out a way that I could get the right dimensions for the bass drone from what I already had with the tenor- the bore of the bass drone is slightly wider, which messed with the thickness of the drone, and I needed to go back and adjust quite a bit of the original sketch.

    The above sketch is a bit of a mess, but I promise it makes sense. A lot of the measurements are taken from my pipes, and optimized through OnShape’s tools. What I mean by this is:

    • The 90º angles have been smoothed out a bit
    • The design of the drone has a natural curve
    • The cord guide is designed with anti-snagging technology (I softened the edges so the cord could move freely)

    Digital Learning Support Director Jerry Slezak sat down with me, and guided me through some of the rough patches in designing this piece. He told me about the engineering courses he has taken, and how he would’ve thought through this problem himself. His insight was incredibly helpful, and pushed me past the roadblock when I struggled to convert the tenor into the bass.

    Today, I also started the beading and combing- this was a bit easier than I had thought it would be, as I remembered one of the tools (the Linear Pattern tool) that I used for the chanter project this time last year.

    It was a bit tedious, and I am running out of time to finish it up today, but I am impressed with how it looks so far!

    Finishing the beading and combing won’t take too much longer, and then I should be able to get all three tops printed and ready for testing!

    ¡Hasta luego!

  • Tenor Top Update

    Hello! I’ve been away for a little bit of time, with Thanksgiving break and all, but I am back!

    My first major update is that we had our first UMW Eagle Pipe Band practice in a while this past Wednesday, the 29th. I hadn’t shown off the tenor drone top to the other EPB members at that point, so I just put it on my pipes to see if anyone would notice. Our pipe major, Olivia Corcoran, was the first to point it out. After playing a few sets, I asked her if she though it sounded alright, to which she responded “I couldn’t really hear it”, which in the world of bagpiping is an excellent sign. (meaning nothing sounded too out of place!)

    Before practice I spent a few minutes adjusting my drone reed- I’m still trying to work out why, but the reed for the 3D printed drone needed to be tuned much lower than the reed for the regular drone.

    The image above is from Henderson Imports, depicting the EzeeDrone Drone Reeds. These are the reeds that I have in my personal pipes. The screws at the bottom of the reeds are called tuning screws. They are one way to control at what pitch the drones tune- this was what I had to adjust, on top of tuning the upper part of the drone, to ensure that I could get the 3D printed drone to match the normal drone.

    It could very well be the result of a millimeter’s difference in the sizing between the drones, but that is mere speculation. I will continue to look into it!

    Incredible success so far! I am currently in the DKC working on the finishing touches of the tenor drone top, and the bass drone top. I will update soon!

  • Tenor Drone Top

    This past Friday (11/3/23), I began printing the updated tenor drone top print, this time, in the correct size!

    I had a bagpipe competition in Richmond, VA early Saturday morning, but I let myself into the DKC and pulled it off the printer after nearly 13 hours of printing.

    The tree supports looked fantastic, as they always do. However, they were not as easy to remove as I had expected, especially those that were inside the drone. It was a bit of a messy process, but after some snipping, ripping, and sanding, it turned out alright.

    Later that night, I popped it onto my pipes to see how it would sound. It was a bit finicky, but I was able to get it to work! By finicky, I mean that the sound produced by the reed was very quavery, and not pleasant to the ears. I messed around with the reed a bit, and tried to situate the drone higher up on the tuning pin, and that seemed to have resolved the problem!

    Bagpipe Anatomy - BAGPIPE LESSON
    https://www.bagpipelesson.com/bagpipe-anatomy.html

    Today, I wanted to add the beading and combing to the drone (these are purely aesthetic, but are a large part of the history and design of the instrument), but I ended up working on the shape of my tenor drone top instead. I should save the beading and combing for when I have my own Blackwood pipes back in my hands so I can take some accurate measurements instead of merely guessing from Google images.

    I narrowed down the neck of the drone so that it would look a little less bulbous and a bit more traditional. I also did this with the beading and combing process in mind, as that wouldn’t have looked great on a rotund design.

    I also wanted to showcase the sketch (the drawing that later revolves into a 3D model). It’s messy. I know. I like to have all of the lengths (mm) displayed so that I can change lengths by typing instead of dragging and dropping. I often work super zoomed-in, so those labels aren’t as jumbled, but zooming out is stressful and I don’t recommend it.

    Anyway- I just copied the tenor drone over to a new project and started testing to see if I could simply stretch it out to make the bass drone.

    Nope! Not that easy. I’ll spend some more time on it next week!

    Later!