Author: Sean

  • 06 Almost There

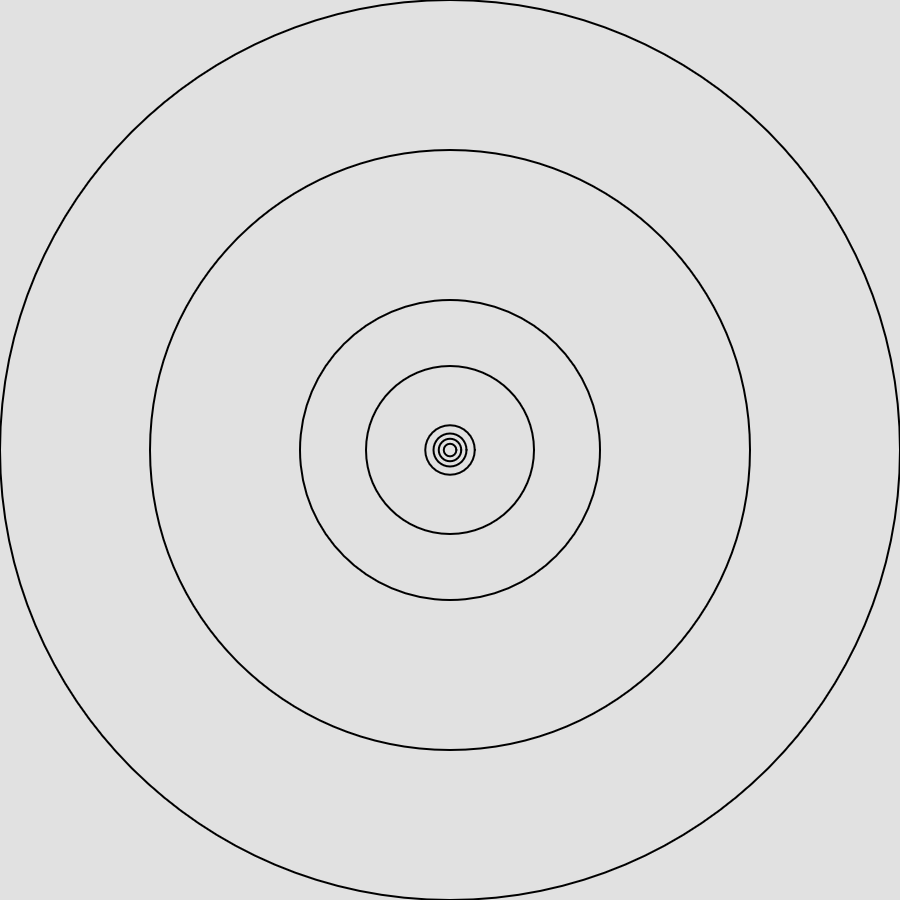
    The last couple of weeks have seen multiple rounds of iteration over my code and a few realizations on how a better structure could have been had from the beginning.

    The first big thing change was the move from circles to ellipses, this took me a while. Turns out, there is a delightful bit of math for tracing the path of an ellipse called the parametric ellipse equation, this takes a parameter, theta (t in this case), an angle between 0 and tau (two * pi), and outputs an x and y value for the circumference of the ellipse at that angle. This plugs into code very simply and allowed me to stretch my orbits to better fit a non-square display.

    Below is the note I have written for myself in the code. It includes a link to the site I used to learn this.

    Parametric equation of an ellipse  
    
    x = cx + a * cos(t)
    y = cy + b * sin(t)
    
    t = angle parameter, from 0 to Tau (2 PI)
    cos(t) = x component
    sin(t) = y component
    
    a & b = scale value for eccentricity
    cx & cy = offset for center point
      
    Source: Math Open Ref - Parametric Ellipse

    With that addition came the challenge of mixing and matching equations. Previously I have been using a p5.js function, arc() to draw the orbits of the planets and fill in the portion of the orbit that they have completed. This also takes the parameters of an ellipse, but this function calculates angle differently. So my orbit fell out of sync with my planet, except at quarter PI intervals. Instead I have switched to drawing the whole orbit, and changing the fill value over time to indicate when an orbit has been completed.

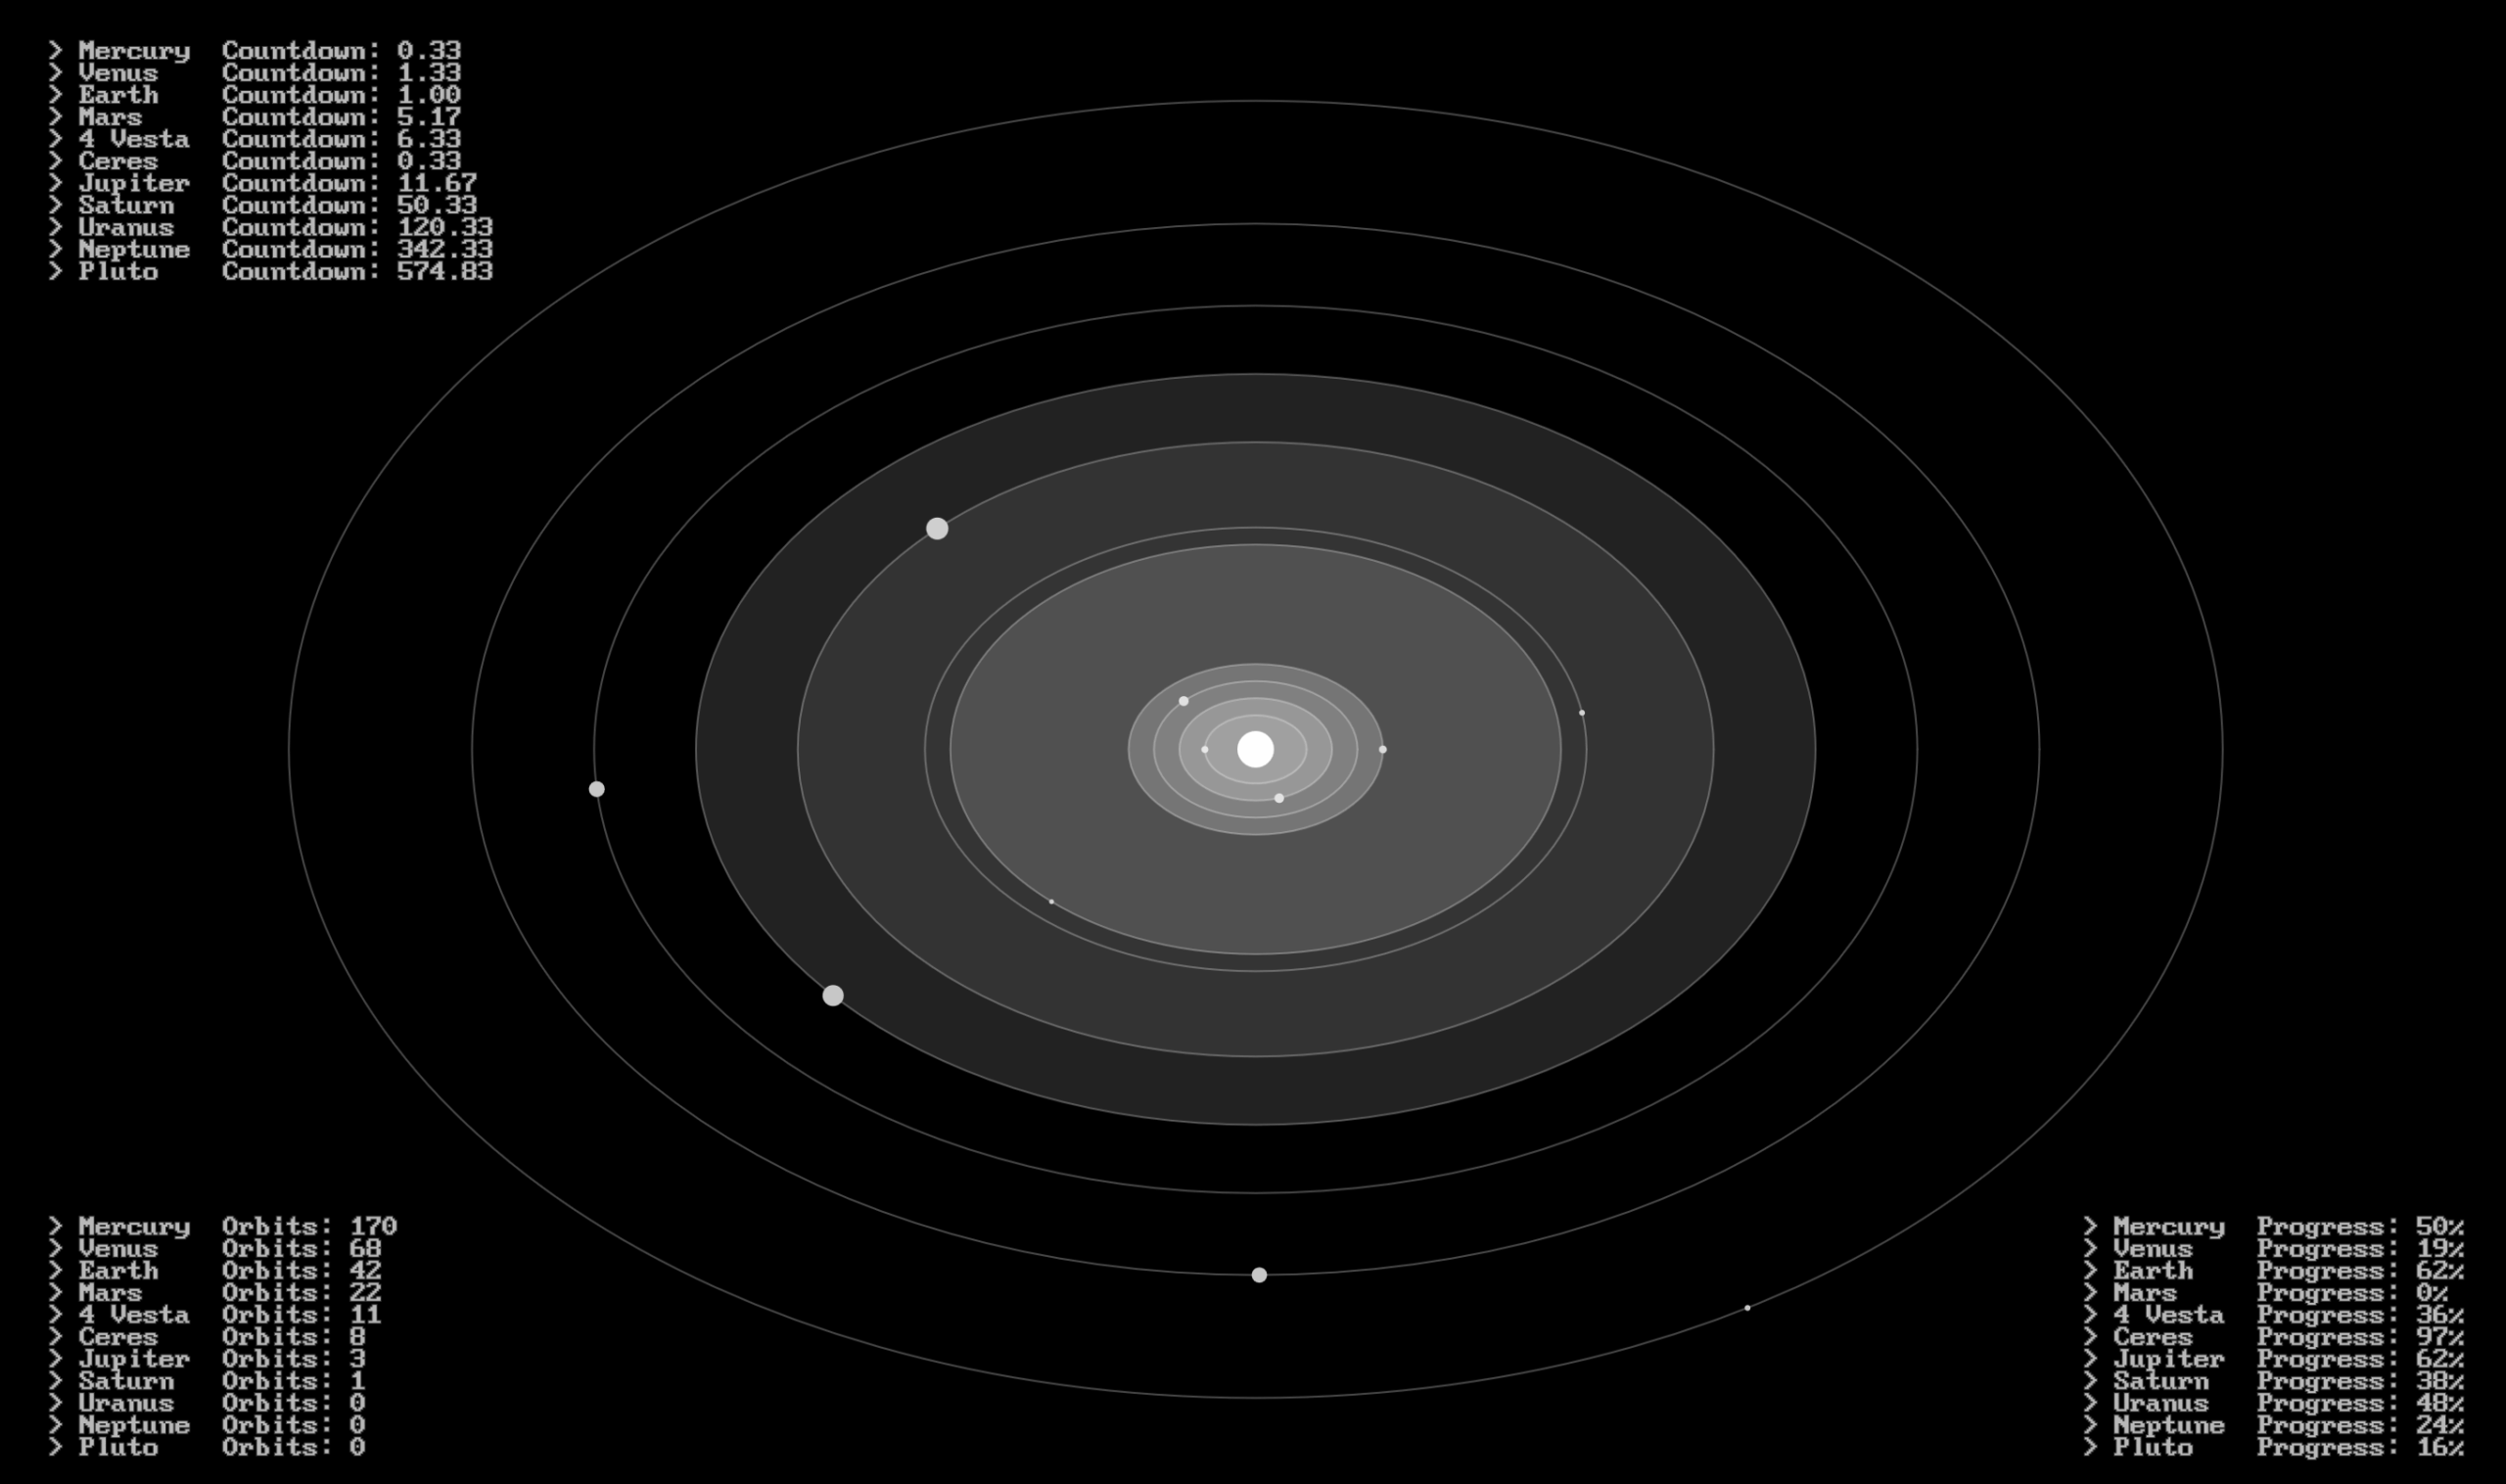
    While adding this functionality and preparing an output of my piece for the HCC Media Wall, I stumbled upon a very simple method for creating a “film grain” effect, simply drawing random points with a slight fade every frame, I am unsure if I will use it for my final piece, but it was a neat find.

    Below is an export of my piece as I have it being shown on the HCC wall (except rotated 90 degrees).

    After that I have been playing around with adding text, I greatly enjoyed seeing the work of Ryoji Ikeda at the High Museum in Atlanta in March. His exhibition, data-verse was, perhaps, the greatest thing I have ever seen in a museum, and I loved the way he uses data and text in his work.
    Currently I have 3 chunks of text, The first displaying how long in seconds until each planet will complete an orbit, the second displaying a count of how many orbits each planet has completed, and third, a percentage of how far along in an orbit each planet is.

    A set of concentric ellipses with circles on various points of the ellipses. Text is the top left, bottom left, and bottom right corners, listing the planets and number corresponding to seconds left in orbit, count of orbits, and progress of orbit as a percentage.

    What’s Left

    Over the next couple of days I will refine this and refine my musical piece in lead up to Research and Creativity day where I will be giving an oral presentation on this project.

    Before I present I will be experimenting with having the text pushed all to one side, adding more text, and most importantly, fixing the synchronization of my music and visuals, I believe I miscalculated either the speed of the music or the speed of rotation of the planets, they do not line up at all.

    I will leave you with a link to the High Museum website which shows a glimpse into Ryoji Ikeda’s beautiful work, and a promise that by next week I will have a finished piece and a reflection to share.

  • 05 Backtracking

    In my previous blog post I explained how I was changing my code to show 3d visuals, that is no longer the case. My idea for how I wanted everything to look was posing problems for how to conceptualize 3d rendering, it will be something I return to in the future.

    Since I have returned to 2 dimensions I have made much more progress towards shaping my visuals towards my original idea. Below are 4 iterations of the visuals, demonstrating a bit of how procedural my decision making is.

    I began with the basic structure, all the planets I wanted orbiting the sun, then I begin emphasizing the orbits to make the planets more clear.

    After that I simply tried seeing what would happen if I filled in the arcs tracing the orbits rather than just the lines, which I do like the look of, but the planets closer to the sun get lost in the bright stack of the orbits. Finally I added the traced arcs back in and I am happy with the look,, for now.

    Below I have a draft of the visuals along with the music, this specific recording is a result of experimenting with the timbres of each notes, trying different virtual instruments, both sampled and synthesized. I am broadly pleased with the effect the visuals have to emphasize the music, though I am not entirely happy with either yet. I specifically need to refine the math I am using to determine the speed of Mercury, the innermost planet, around the sun, it does not seem to be lining up the way I want but that should be a simple fix.

    And finally, my code, there is currently a lot of extra material that is doing nothing, I would like to implement a small explosion or expansion effect whenever a body passes the vertical threshold and a note is triggered. I am also considering adding a starfield in the background, normally these fields of light illustrate fast travel through space but I think a spiral would be a very nice effect, I could have multiple layers of stars moving at different speeds and different sizes to illustrate distance, I think this would add some nice depth. I will of course also be working more on the sound of the music.

    let objects = [];
    let stars = [];
    const bpm = 90;
    // 90beats_minute / 60seconds_minute = 1.5beats_second
    // 60frames_second / 1.5beats_second = 40 frames_beat
    const framesPerBeat = 60 / (bpm / 60);
    
    // fullscreen, !CHANGE FOR SPECIFIC EXPORT!
    var w = window.innerWidth;
    var h = window.innerHeight; 
    
    function setup() {
        createCanvas(w, h);
        frameRate(60);
        angleMode(RADIANS);
    
        const min_dist = min(width, height);
        const dist_increment = (min_dist/15);
        const max_dist = min_dist - ((dist_increment) / 2);
        console.log(max_dist);
    
        // "...,you must first create the universe."
        // name size color distance orbit_speed
        objects.push(new Body('Sol',  20,  color(255),  0,  0));
        // Create objects - Inner System
        objects.push(new Body('Mercury',  5,  color(145),  30,  1));
        objects.push(new Body('Venus',  7,  color(145),  42,  2.5));
        objects.push(new Body('Eearth',  8,  color(145),  55,  4));
        objects.push(new Body('Mars',  6,  color(145),  67,  7.75));
        // Create Planets - Asteroid Belt
        objects.push(new Body('4 Vesta',  2,  color(145),  130,  15));
        objects.push(new Body('Ceres',  3,  color(145),  150,  19));
        // Create Planets - Outer System
        objects.push(new Body('Jupiter',  12,   color(145),  210,  47));
        objects.push(new Body('Saturn',  11,   color(145),  230,  123));
        objects.push(new Body('Uranus',  10,   color(145),  270,  351));
        objects.push(new Body('Neptune',  9,   color(145),  310,  684));
        // Create Planets - Kuiper Belt
        objects.push(new Body('Pluto',  4,   color(145),  390,  1032.75));
    }
    
    function draw() {
        // background(135, 145, 155);
        background(17,17,23);
    
        push();
        stroke(255, 50);
        // line(width/2, 0, width/2, height/2);
        pop();
    
        objects.forEach(planet => { // Render objects
            planet.display_orbit();
            planet.display();
            planet.orbit();
        });
        // noLoop();
    }
    
    // Sphere class to represent sol and the other objects
    class Body {
        constructor(name, size, col, distance = 0, orbitSpeed = 0) {
            this.name = name;
            this.size = size; // diameter
            this.col = col; // color
            this.distance = distance; // Orbit diameter
            this.orbitSpeed = TWO_PI/(orbitSpeed * framesPerBeat); // degrees of rotation each frame
            this.angle = TWO_PI - HALF_PI; // cumulative angle change
            this.angle = random(TWO_PI); //TODO TESTING
            // this.explosion = new Explosion();
        }
    
        orbit() {
            if (this.distance > 0)
                this.angle += this.orbitSpeed;
        }
    
        display_orbit() {
            push();
            translate(width/2, height/2); // center screen
            // noFill();
            fill(255, 15); //TODO TESTING
            stroke(255, 75);
            // noStroke(); //TODO TESTINGx
            /* draw arc from 0 to position in orbit */
            arc(0, 0, this.distance * 2, this.distance * 2, TWO_PI - HALF_PI, this.angle);
    
            pop();
        }
    
        display() {
            push();
            translate(width/2, height/2); // center screen
            rotate(this.angle); // apply orbit
            translate(this.distance, 0, 0); // distance from sol
    
            noStroke();
            fill(this.col);
            circle(0, 0, this.size);
            pop();
        }
    }
    
    class Star {
        constructor(xpos, ypos, xvel, yvel, size, col) {
            this.xpos = xpos;
            this.ypos = ypos;
            this.xvel = xvel;
            this.yvel = yvel;
            this.size = size;
            this.col = col;
        }
    
        move() {
            this.xpos = xpos + this.xvel;
            this.ypos = ypos + this.yvel;
        }
    
        display() {
            fill(this.col);
            circle(this.xpos, this.ypos, this.size);
        }
    
    }
    
    class Explosion{
        constructor(maxSize, size, col, distance, xpos, ypos, angle, speed) {
            this.maxSize = maxSize;
            this.size = size;
            this.col = col;
            this.distance = distance;
            this.xpos = xpos;
            this.ypos = ypos;
            this.angle = angle; // TWO_PI - HALF_PI
            this.speed = speed;
        }
    
        display() {
            circle(this.xpos, this.ypos, this.size);
        }
    
        expand() {
            this.size += this.maxSize/this.speed;
        }
    
    
    }
    
    /* name    | Orbital Period n:Mercury | Diameter M | Distance M | Diameter Scale n:Mercury
       Sun     | 0                        | 1          | 0          | 294.118
       Mercury | 1                        | 0.0034     | 42         | 1
       Venus   | 2.5                      | 0.0086     | 75         | 2.529
       Earth   | 4                        | 0.0091     | 110        | 2.676
       Mars    | 7.75                     | 0.0048     | 165        | 1.412
       4 Vesta | 15                       | tiny       | 247.8      | 0.108
       Ceres   | 19                       | tiny       | 290.85     | 0.471
       Jupiter | 47                       | 0.1        | 560        | 29.412
       Saturn  | 123                      | 0.084      | 1000       | 24.706
       Uranus  | 351                      | 0.034      | 2000       | 10
       Neptune | 684                      | 0.033      | 3000       | 9.1
       Pluto   | 1032.75                  |            |            | 0.487 
    */

    At the bottom of the code is a table I wrote with the data I am using and the data I hoped to use. Unfortunately the solar system is just too large to have it all in one screen, the sun ends up 1 pixel wide, Pluto isn’t even on the screen and none of the planets are visible being tens and hundreds of times smaller than the sun, making every planet, tens and hundreds of 1 pixel.

  • 04 A New Dimension

    In order to prepare for working with 3d objects (my plan for representing the planets), I wanted to familiarize myself with the tools in p5.js that enable 3d. As it turns out, they’re rather simple. You must simply declare the canvas with an extra argument (WEBGL), and then you may call commands such as orbitControl() which enables movement in 3d via the mouse.

    To practice the placing of objects in 3d, I played around with the code snippets provided in the documentation. Firstly, it’s just a sphere comprising rings of cubes.

    A radially symmetrical pattern comprising blue boxes that describe a sphere in rings
    A radially symmetrical pattern comprising blue boxes that describe a sphere in rings. Shown off axis revealing the sphere

    I added the ability to make concentric layers, here is 1 internal layer.

    To ensure this looks nice I am scaling the size of the cubes, the distance between the spheres of cubes, and the line thickness of each edge of the cubes.

    A radially symmetrical pattern comprising blue boxes that describe a sphere in rings.
    A radially symmetrical pattern comprising blue boxes that describe a sphere in rings. Shown off axis revealing an internal sphere of smaller cubes.

    And at 9 internal layers, 10 concentric spheres in total, some interesting shapes and patterns emerge.

    A radially symmetrical pattern comprising blue boxes that describe a sphere in rings. With more cubes from the internal spheres the shape is bolder and more vaguely floral.
    A radially symmetrical pattern comprising blue boxes that describe a sphere in rings. Shown off axis, revealing the structure of the sphere and the 9 concentric spheres comprising smaller cubes.

    Below is the code that was used to generate these images. I achieve different results by tweaking the values I have passed into different functions, chiefly the scale of the main sphere and number of sub-spheres passed into drawCubeSpheres(50, 10); 50 being the size used for all of these images, and 10 being the amount of spheres in these final two images

    function setup() {
    
        createCanvas(1150, 750, WEBGL);
    
        angleMode(DEGREES);
        noFill();
        stroke(32, 8, 64, 255);
        describe(
            "Users can click on the screen and drag to adjust their perspective in 3D space. The space   contains a sphere of dark purple cubes on a light pink background.");
    }
    
    function draw() {
    
        background(250, 180, 200);
    
        // Call every frame to adjust camera based on mouse/touch
    
        orbitControl();
    
        drawCubeSphere(50,10);
    
    }
    
    function drawCubeSphere(scale, numSpheres) {
        scale = ceil(scale);
        // number of spheres of cubes
        for (let i = 0; i < numSpheres; i++) {
            // Rotate rings in a half circle to create a sphere of cubes
            for (let zAngle = 0; zAngle < 180; zAngle += 30) {
                // Rotate cubes in a full circle to create a ring of cubes
                for (let xAngle = 0; xAngle < 360; xAngle += 30) {
                    push();
                    // Rotate from center of sphere
                    rotateZ(zAngle);
                    rotateX(xAngle);
                    // Then translate down (eg.)50 * 8 = 400 units
                    translate(0, (scale * 8) / (i + 1), 0);
    
      
                    strokeWeight(scale / 10 / (i + 1)); // scales down
                    // strokeWeight((scale / 10) * (i + 1)); // scales up
                    // strokeWeight(5); // constant
                    box(scale / (i + 1)); // scales down
                    // box(scale * (i + 1)); // scales up
                    // box(scale); // constant
                    pop();
                }
            }
        }
    }

    What I’m working on next in this area is tracing 3d objects around a circular/elliptical field. This project is involving more math revision than I anticipated but i do welcome the process of refreshing my geometry.

    Music

    I must admit little progress has been made the last couple of weeks due to my failing to schedule time experimenting with music, I do however have a demonstration of the music in its starting state. I am working in Bitwig Studio as opposed to Ableton Live because I’ve found it much more stable and crashes far less often. The video shows one track per planet/celestial object and in this current state each orbiting body is introduced slowly to get the listener accustomed to the rhythm before further complicating it with more and more cycles of notes.

    This week I will be playing more with the actual sound or timbre of each planet as well as trying more structures that the piece might work in.

  • 03 New Idea ≈ Old Idea

    What I found:

    While looking back on some old projects, I dug up something wonderful. It is a simple idea, creating music from the ratios found among the orbital periods of stellar bodies.

    Each body (planet) has a single note assigned to it, this note is selected from a scale and the organization of the pitches is based in either the mass or diameter of the celestial body.

    It has been at least three years and I have yet to find the notes I took on this idea so I will have to recalculate what the ratios are.

    The rhythm of this musical idea comes from the orbital periods, or how long each planet takes to orbit the sun. I took Mercury as my reference point since it orbits the fastest. One orbit of Mercury’s was then used to find a ratio of all other planets.

    Finally, the note duration was determined by the distance from the sun, this was purely subjective as I thought it gave a nice balance between the persistent ticking of mercury and the rarer and more impactful low tones of Saturn and Jupiter.

    At the time I was making this I thought it would be very cool to have a visual to accompany it, well, here’s the perfect opportunity.

    What I am going to change:

    The initial project was relatively rough, I used a very similar sound for each note which makes it cohesive but I don’t find it particularly compelling. As I take the time to edit the project and work on it further, my main goal will be doing more sound design. I would like to characterize the planets more with their sounds and make something more generally pleasant sounding.

    I also want to spend some time turning this from an endless loop into an arranged piece of music, which conveys a stronger sense of direction.

    What I am going to add:

    As stated above, I would like to visualize this, I think a very direct visual of abstract planets orbiting a sun will work wonderfully. To begin illustrating this idea, I have made a new p5.js sketch that simply shows a rough orbit for each planet. The scale is roughly accurate in that the orbits represent the average distance from the sun for each planet, though, they are perfectly circular and flat. Below is the output of that sketch, that tiny little spec in the middle is the sun (at this resolution the sun isn’t actually visible, the planets themselves will be orders of magnitude smaller) and the largest circle is the orbit of Neptune.

    9 black concentric on a grey field.

    I think I will have to spend some time discovering a good balance between accuracy and legibility, I don’t imagine I’ll keep the sun this small and the planets will be impossible to see at this scale (as they are, in fact, incredibly small next to the sun).

    Below is the code that produced the above image

    const diameterOrbitScale = .075;
      
    function setup() {
    createCanvas(diameterOrbitScale*3000, diameterOrbitScale*3000, WEBGL2);
    noLoop();
    }
      
    function draw() {
    background(225);
      
    stroke(color(0,0,0)); // Black outline
    strokeWeight(1); // Thin outline
    
    // The Sun
    
    push(); // begin drawing group with isolated styling/effects
    fill(color(255, 255, 0)); // yellow
    noStroke(); // No Outline
    circle(width/2, height/2, diameterOrbitScale*1); // Sun
    pop(); // stop drawing group
      
    // Inner Orbits
    
    noFill(); // No fill color
      
    circle(width/2, height/2, diameterOrbitScale*42); // Mercury orbit
    circle(width/2, height/2, diameterOrbitScale*75); // Venus orbit
    circle(width/2, height/2, diameterOrbitScale*110); // Earth orbit
    circle(width/2, height/2, diameterOrbitScale*165); // Mars orbit
    
    // Outer Orbits
    
    circle(width/2, height/2, diameterOrbitScale*560); // Jupiter orbit
    circle(width/2, height/2, diameterOrbitScale*1000); // Saturn orbit
    circle(width/2, height/2, diameterOrbitScale*2000); // Uranus orbit
    circle(width/2, height/2, diameterOrbitScale*3000); // Neptune orbit
    }

  • 02 Noodles and Doodles

    I have been doing two things: Re-familiarizing myself with p5.js by duplicating and editing sketches from The Nature of Code, and, following my curiosities with musical systems.

    First, the code. The first parts of The Nature of Code describe making a random walk, this is a simple system where you have a walker, in this case a dot, and every time interval, it takes a step in a random cardinal direction. Up, Down, Left, or Right. It is quite easy and has a pleasantly organic look already. Below is a video demonstrating the walk, and a code snippet of how it is driven.

    // The Nature of Code
    // Daniel Shiffman
    // http://natureofcode.com
    
    let walker;
    
    function setup() {               // once at the beginning of the program, perform this code
      createCanvas(640, 240); // create a window of width 640 and height 240 pixels
      walker = new Walker();     // create a new walker object
      background(255);             // set the background to white
    }
    
    function draw() {       // every frame, perform this code
      walker.step();          // make the walker take a step in a random direction
      walker.show();         // draw the walker in it's new position
    }
    
    class Walker {                      // all the code defining the walker object is in here
      constructor() {                   // run this code when the walker is created               
        this.x = width / 2;             // position the walker in the dead center of the screen
        this.y = height / 2;
      }
    
      show() {                     // run this code when the command walker.show() is run
        stroke(0);                 // set the stroke color to black
        point(this.x, this.y);  // draw a stroke at the x & y positions stored in the walker
      }
    
      step() {                                                  // run this code every time walker.step() is run
        const choice = floor(random(4));        // generate a random number between 0 and 4, exclusive
        if (choice == 0) {                                  // change the x or y position dependent on the random value
          this.x++;
        } else if (choice == 1) {
          this.x--;
        } else if (choice == 2) {
          this.y++;
        } else {
          this.y--;
        }
      }
    }
    

    This code comes directly from The Nature of Code book. All lines, besides the attribution, starting with “//” are comments written by myself to explain the code.

    I decided to run with what was given to me here. After maybe an hour of tweaking settings and experimenting with the background opacity, I found a way to have a random walk that left me with a very organic and flowing movement, shown below.

    You will notice many comments in my own code, this is because while testing new ideas, it can be helpful to retain old ideas. So rather than deleting lines, I comment them out. They do not affect the output of the program.

    let walkers = [];
    
    function setup() {
        createCanvas(800, 800);
        for (let i = 0; i < 2000; i++) {
            let walker = new Walker(17)
            walkers.push(walker);
        }
        background(225);
    }
    
    function draw() {
        background(255, 10);
        for (i = 0; i < walkers.length; i++){
            walkers[i].step();
            walkers[i].show();
        }
    }
    
    class Walker {
        constructor(size) {
            // this.x = random(width);
            // this.y = random(height);
            this.x = width/2;
            this.y = height/2;
            this.size = size;
            // this.hue = floor(random(50));
            // this.shade = color(this.hue);
            this.hueshifts = [50, 20, 50];
            this.shade = color(this.hueshifts[0],this.hueshifts[1],this.hueshifts[2]);
        }
    
        show() {
            stroke(this.shade);
            strokeWeight(this.size);
            point(this.x, this.y);
        }
        
        step() {
            let xstep = random(-this.size, this.size);
            let ystep = random(-this.size, this.size);
            this.x += xstep/7;
            this.y += ystep/7;
            //let stepMult = random(min(width, height) / 200);
            //this.x += xstep*stepMult;
            //this.y += ystep*stepMult;
            
            /* keep walker on canvas horizontally */
            if (this.x >= width + (1.5*this.size) | this.x <= 0 - (1.5*this.size)) {
                this.x = width/2;
                this.y = height/2;
                // this.x = random(width);
                // this.y = random(height);
                // this.size-=1;
                // this.grey -= 102;
                // this.shade = color(this.grey);
            }
            
            /* keep walker on canvas vertically */
            if (this.y >= height + (1.5*this.size)| this.y <= 0 - (1.5*this.size)){
                this.x = width/2;
                this.y = height/2;
                // this.x = random(width);
                // this.y = random(height);
                // this.size-=1;
                // this.grey -= 102;
                // this.shade = color(this.grey);
            }
            
            // const choice = floor(random(4));
            
            // switch(choice) {
            //   case 0:
            //     this.x+=this.size;
            //     break;
            //   case 1:
            //     this.x-=this.size;
            //     break;
            //   case 2:
            //     this.y+=this.size;
            //     break;
            //   case 3:
            //     this.y-=this.size;
            // }
        }
    }


    This code is more convoluted, essentially, I am creating not just one walker, but 2000, they are a larger size, and move diagonally as well. When a walker reaches the edge of the window, they are relocated inside the window. Before reaching this result I experimented with changing the size of walkers that reached the edge or changing their color but none of these were as satisfying of effects to me.

    The final bit of code experimentation from the last couple weeks here was messing with a different type of randomness. Normal (pseudo) randomness, as seen above, distributes random values equally between the minimum and maximum range. Below is an example of a Gaussian noise, this code plots dots on the canvas based on random Gaussian values, that is, there is a concentration around the mean (average) and a standard deviation defines how the distribution changes away from the mean.

    Next up for my coding will be going through more Nature of Code exercises and pursuing my curiosities off of the code given. I am particularly excited and interested to begin playing with random noise, specifically Perlin or OpenSimplex noise, these are techniques for generating random values that create organic shapes because the changes between values are smooth and they lend themselves to animation.


    Next I would like to briefly explain the music I have been experimenting with. Below are two videos demonstrating an asynchronous looping technique. This means I have created at least two loops, repeating sections of audio, that are not the same length, therefore, they do not play in sync. This shifting relationship between the multiple loops is very intriguing to me.

    In this first experiment I have created 7 instances of a virtual flute instrument. Each instance is assigned a note, and a loop length. After each loop, the octave of the note changes to a different one within a set of 3 defined octaves. On the first go-round, we hear all of the instruments playing together in perfect sync, they start together and all of the notes are the same length. The second time we hear the collective chord, the notes are not in line with each other. Each time these individual instruments loop, they fall further apart from each other creating an increasingly complex and interesting relationship.

    In this second experiment, I did something similar to the first. In this case, I have just two instances of an identical instrument, this time a sampled piano. Each piano plays to one side of the stereo field and plays an short identical melody. The only difference is a small shift in the length of the loop and a couple of tiny tweaked settings in one of the pianos to make the timbre so slightly different.

    I found this to be far more interesting to me, having melodies play against each other is far more engaging than simply the long droning notes of the previous experiment. An interesting side effect of how I set up this system is that it does repeat. While the first experiment (I’ve been calling it Flute Loops), is random and will not repeat for an inconceivably long time, this piece (I’ve been calling it Lekko Loops (the piano is named Lekko)), repeats after exactly 6 minutes, the length of the melody loops are a round division of the tempo and relatively quickly are back in line.

    Both of these examples are relatively simple and quickly become uninteresting. As I delve further into this technique and find more textures or arrangements I enjoy, I will leave less up to chance and begin crafting a piece of music that slowly shifts over time, beyond the shifting of the loops.

  • 01 Beginning: Creating and Visualizing Electronic Music

    Good morning, good day, or good evening. This is my first post for this project and I would just like to do a few introductions: what I intend to create, how I will go about creating it and some of the steps along the way.

    What I intend to create: The end goal

    At the end of this project I would like to have a pleasant piece of music, written, recorded, mixed, and exported. Along with this musical piece I will have a visual or visualization that is custom made to accompany the piece.

    How I will create this piece: Techniques and tools

    The tools I will be using are a Digital Audio Workstation (DAW), I have access to and experience with both Bitwig Studio and Ableton Live, numerous virtual instruments and plugins within said DAW. For the visuals I will be using a combination of generated components and possibly some filmed footage, either way I will be using DaVinci Resolve to edit my visual component, this is a great (and free) nonlinear editor for video. To generate visuals I will be experimenting with P5.js, a library created for JavaScript designed for creating and manipulating images or visuals.

    In terms of techniques, I am very intrigued by some of the techniques used by Brian Eno (the artist credited with coining the term ‘Ambient Music’), specifically his use of asynchronous looping tape machines, this should be easy to replicate and experiment with digitally. Visually I am quite intrigued by the idea of integrating some of the systems exemplified in Daniel Shiffman’s book ‘The Nature of Code‘. These tutorials and example projects demonstrate beautiful ways of replicating apparently natural motion within a programmatic environment. I believe this can be linked to the software messages used for communicating with virtual instruments to great effect. One final technique to mention is that of Motion Extraction (embedded below), a video editing technique demonstrated by the Youtuber/film maker Posy. I am not currently sure if I will try the technique myself but I do find it compelling.

    Steps to be taken: The first

    There are already a few tasks I have laid out for myself within this project. The first being to identify a more specific musical goal. In the past I have tried a multitude of genres and structures, I believe picking a few, or if possible, one, to start with as a target will help my planning. Whatever it is, I’m sure it will involve some form of generative or programmatic music. As I begin stepping into some musical ideas, I will also be following along with The Nature of Code’s tutorials, through this I will find a path to follow with integrating my own idea for a natural system to demonstrate my music output.

    Next time, I hope to have a couple of musical snippets to share, and maybe even a duplication of a coding system or two that I find particularly compelling. Attached to this post is an audio snippet and screenshot of a simple musical system I’ve been listening to while writing, I find listening to a generative system such as this in the background can be very instructive for deciding if there is any element I wish to change, somethings may stand out or be lacking over time.

    Background plinks and plonks
    Ableton Live Screenshot. Just one track in session view.