Author: Evelyne

  • Evelynestallation Blog Post 8- Final Post!

    Dear reader, thank you for accompanying me on the journey from initial concepts to a finished lighting project in the HCC! I hope that you learned a lot and that you’ll be able to implement my code in your own lighting endeavors.

    My biggest personal takeaway from this project is that creative engineering causes creative outcomes. This installation is nothing like my original plan, which was also nothing like my original project proposal. We even completely changed the installation plan on the very day we were installing it. Other than the fact that sparkle lights happened, nothing ended up the way I thought it would- and I’m so glad. This is so much better than my original creative vision!

    I hope, when you do your own projects, that you persevere through difficult things like fried microcontrollers and discover projects that are far cooler than what you originally intended to make. You can do a project just like this one with a few wires, a microcontroller, and a string of lights!

    The video below is a short clip of the lights in the HCC displaying the Rainbow Comet code from one of my earlier blog posts. The full code currently running is posted in blog post 7.

    And, of course, here’s some sparkle lights code, adapted from the original nighttime code for the third floor:

    #include <Adafruit_NeoPixel.h>
    #ifdef __AVR__
      #include <avr/power.h>
    #endif
    #define PIN      5
    #define NUMPIXELS 150
    
    
    Adafruit_NeoPixel pixels(NUMPIXELS, PIN, NEO_GRB + NEO_KHZ800);
    
    #define DELAYVAL 15
    #define DELAYVAL2 50
    #define DELAYVAL300 10 
    #define BIGDELAYLOOP  15400
    #define BIGDELAY 13900
    
    
    void setup() {
    #if defined(__AVR_ATtiny85__) && (F_CPU == 16000000)
      clock_prescale_set(clock_div_1);
    #endif
    
      pixels.begin(); 


    }
    
    void loop() {
      for (int g=0; g<12; g++)
    {
      for(int i=0; i<NUMPIXELS; i++) {
    
    
        pixels.setPixelColor(i, pixels.Color(0, 0, 0));
         pixels.show();
       
        }
    for (int q=0; q<2400; q++)
      {
      int x=0;
      int y=0;
      int z=120;
    
    for (int t=0; t<50; t++) //red to green
    {
    for(int i=0; i<NUMPIXELS; i++) {
    
    pixels.setPixelColor(i, pixels.Color(z, x, y));
    
    pixels.show();
    
    }
    
    delay(DELAYVAL2);
    
    z--;
    x++;
    }
    
    for (int t=0; t<50; t++) //green to blue
    {
    for(int i=0; i<NUMPIXELS; i++) {
    
    pixels.setPixelColor(i, pixels.Color(z, x, y));
    
    pixels.show();
    
    
    }
    
    delay(DELAYVAL2);
    
    y++;
    x--;
    }
    
    for (int t=0; t<50; t++) //blue to red
    {
    for(int i=0; i<NUMPIXELS; i++) {
    
    pixels.setPixelColor(i, pixels.Color(z, x, y));
    
    pixels.show();
    
    
    }
    
    delay(DELAYVAL2);
    
    y--;
    z++;
    } 
     
      }
        
    }
    
  • Evelynestallation Blog Post 7

    Wow, it’s been a while since I’ve written! However, if you’ve been on campus, you might have seen the lights up and running in the HCC. In blog post 6, I talked about the successful installation, so if you’d like to learn more, check it out!

    If you read blog post 6, you may remember that I fried one of the boards on accident. We got a new one, and I wired it correctly this time. In this post, I wanted to address the wiring system I used in full. It’s a little complex, so bear with me.

    The third floor wiring system is relatively simple. The lights have a voltage wire and a ground wire that connect directly to a power converter that plugs into the wall. The Elegoo Mega, my microcontroller of choice, is plugged directly into a separate power converter. Lastly, the two components (microcontroller and lights) are connected to each other by a ground wire and a digital wire, which connects to one of the digital pins on the microcontroller. The code calls out that specific digital pin and assigns lights to it. All in all, it’s four wires. Just don’t forget to connect the lights to a microcontroller ground pin- the digital pin puts out voltage and if you don’t close the loop, it will fry something. I’ll include resources if you want to learn more under the block of code!

    The second floor wiring system is more complex than the one on the third floor, but only because of the second set of lights. Instead of requiring six wires, the second floor system uses eight. One set of lights is wired in the exact same way as the lights on the third floor, and the other set simply connects to a different digital pin and ground pin on the microcontroller. Just remember that each set of lights needs power (from the power converter) and data (from the microcontroller) and that every time a power or data wire is connected, a ground wire needs to be connected, too.

    I’ll include a picture below, but it’s a bit difficult to see the wiring as it looks like a tangled mess. There’s a method to the madness, I promise!

    Wiring in various colors connected to an Elegoo Mega microcontroller with a strand of lights in the frame

    Of course, it wouldn’t be an Evelynestallation blog post without a block of code, so I’ll attach the code the second floor lights are currently running. It’s a really pretty one- three rainbow comets, a pause, and then white sparkles. I enjoyed coding it, and I hope you enjoy getting to use it! The code for the third floor is similar. Just cut out everything marked with the number 2, and you’ll be all set.

    #include <Adafruit_NeoPixel.h>
    #ifdef __AVR__
      #include <avr/power.h>
    #endif
    #define PIN      5
    #define PIN2     7
    #define NUMPIXELS 300
    #define NUMPIXELS2 178
    
    Adafruit_NeoPixel pixels2(NUMPIXELS2, PIN2, NEO_GRB + NEO_KHZ800);
    
    Adafruit_NeoPixel pixels(NUMPIXELS, PIN, NEO_GRB + NEO_KHZ800);
    
    #define DELAYVAL 15
    #define DELAYVAL2 50
    #define DELAYVAL300 10 
    #define BIGDELAYLOOP  12000
    
    
    void setup() {
    #if defined(__AVR_ATtiny85__) && (F_CPU == 16000000)
      clock_prescale_set(clock_div_1);
    #endif
    
      pixels.begin(); 
        pixels2.begin();


    }
    
    void loop() {
      for (int g=0; g<12; g++)
    {
      for(int i=0; i<NUMPIXELS; i++) {
    
    
        pixels.setPixelColor(i, pixels.Color(0, 0, 0));
         pixels.show();
       
        }
        for(int i=0; i<NUMPIXELS2; i++) {
    
    
        pixels2.setPixelColor(i, pixels2.Color(0, 0, 0));
         pixels2.show();
       
        }
      //rainbows comet loop
      
        for(int i=NUMPIXELS; i>-56; i--) {
     
       pixels.setPixelColor(i, pixels.Color(255, 0, 0));
       pixels.setPixelColor(i+1, pixels.Color(255, 62.5, 0));
       pixels.setPixelColor(i+2, pixels.Color(255, 127.5, 0));
       pixels.setPixelColor(i+3, pixels.Color(0, 255, 0));
       pixels.setPixelColor(i+4, pixels.Color(0, 127.5, 255));
       pixels.setPixelColor(i+5, pixels.Color(0, 0, 255));
       pixels.setPixelColor(i+6, pixels.Color(255, 0, 255));
       pixels.setPixelColor(i+7, pixels.Color(0, 0, 0));
    
     
     pixels.setPixelColor(i+60, pixels.Color(255, 0, 0));
       pixels.setPixelColor(i+61, pixels.Color(255, 62.5, 0));
       pixels.setPixelColor(i+62, pixels.Color(255, 127.5, 0));
       pixels.setPixelColor(i+63, pixels.Color(0, 255, 0));
       pixels.setPixelColor(i+64, pixels.Color(0, 127.5, 255));
       pixels.setPixelColor(i+65, pixels.Color(0, 0, 255));
       pixels.setPixelColor(i+66, pixels.Color(255, 0, 255));
       pixels.setPixelColor(i+67, pixels.Color(0, 0, 0));
    
       pixels.setPixelColor(i+120, pixels.Color(255, 0, 0));
       pixels.setPixelColor(i+121, pixels.Color(255, 62.5, 0));
       pixels.setPixelColor(i+122, pixels.Color(255, 127.5, 0));
       pixels.setPixelColor(i+123, pixels.Color(0, 255, 0));
       pixels.setPixelColor(i+124, pixels.Color(0, 127.5, 255));
       pixels.setPixelColor(i+125, pixels.Color(0, 0, 255));
       pixels.setPixelColor(i+126, pixels.Color(255, 0, 255));
       pixels.setPixelColor(i+127, pixels.Color(0, 0, 0));
       
       pixels.show();
       delay(DELAYVAL300*4);
        }
        
        for(int i=0; i<NUMPIXELS; i++) {
    
    
        pixels.setPixelColor(i, pixels.Color(0, 0, 0));
         pixels.show();
       
        }
        for(int i=22; i<NUMPIXELS2+NUMPIXELS2; i++) {
     
       pixels2.setPixelColor(i, pixels2.Color(255, 0, 0));
       pixels2.setPixelColor(i-1, pixels2.Color(255, 62.5, 0));
       pixels2.setPixelColor(i-2, pixels2.Color(255, 127.5, 0));
       pixels2.setPixelColor(i-3, pixels2.Color(0, 255, 0));
       pixels2.setPixelColor(i-4, pixels2.Color(0, 127.5, 255));
       pixels2.setPixelColor(i-5, pixels2.Color(0, 0, 255));
       pixels2.setPixelColor(i-6, pixels2.Color(255, 0, 255));
       pixels2.setPixelColor(i-7, pixels2.Color(0, 0, 0));
    
       pixels2.setPixelColor(i-60, pixels2.Color(125, 0, 0));
       pixels2.setPixelColor(i-61, pixels2.Color(125, 31, 0));
       pixels2.setPixelColor(i-62, pixels2.Color(125, 62, 0));
       pixels2.setPixelColor(i-63, pixels2.Color(0, 125, 0));
       pixels2.setPixelColor(i-64, pixels2.Color(0, 62, 125));
       pixels2.setPixelColor(i-65, pixels2.Color(0, 0, 125));
       pixels2.setPixelColor(i-66, pixels2.Color(125, 0, 125));
       pixels2.setPixelColor(i-67, pixels2.Color(0, 0, 0));
    
    
       pixels2.setPixelColor(i-120, pixels2.Color(125, 0, 0));
       pixels2.setPixelColor(i-121, pixels2.Color(125, 31, 0));
       pixels2.setPixelColor(i-122, pixels2.Color(125, 62, 0));
       pixels2.setPixelColor(i-123, pixels2.Color(0, 125, 0));
       pixels2.setPixelColor(i-124, pixels2.Color(0, 62, 125));
       pixels2.setPixelColor(i-125, pixels2.Color(0, 0, 125));
       pixels2.setPixelColor(i-126, pixels2.Color(125, 0, 125));
       pixels2.setPixelColor(i-127, pixels2.Color(0, 0, 0));


       pixels2.show();
       delay(DELAYVAL300*4);
        }
        
        for(int i=0; i<NUMPIXELS2; i++) {
    
    
        pixels2.setPixelColor(i, pixels2.Color(0, 0, 0));
         pixels2.show();
       
        }
         delay(BIGDELAYLOOP);
        
        
        //triple sparkle
    
         for (int a=0; a<100; a++)
    {
    long w= random(0,NUMPIXELS);
    long p= random(0,NUMPIXELS);
    long q= random(0,NUMPIXELS);
    long ww= random(0,NUMPIXELS2);
    long pp= random(0,NUMPIXELS2);
    long qq= random(0,NUMPIXELS2);
    
        pixels.setPixelColor(w, pixels.Color(255, 255, 255));
        pixels.show();
        pixels.setPixelColor(p, pixels.Color(255, 255, 255));
        pixels.show();
        pixels.setPixelColor(q, pixels.Color(255, 255, 255));
        pixels.show();
       
        pixels2.setPixelColor(ww, pixels2.Color(255, 255, 255));
        pixels2.show();
        pixels2.setPixelColor(pp, pixels2.Color(255, 255, 255));
        pixels2.show();
        pixels2.setPixelColor(qq, pixels2.Color(255, 255, 255));
        pixels2.show();
    
       delay(200);
    
       pixels.setPixelColor(w, pixels.Color(0, 0, 0));
       pixels.setPixelColor(p, pixels.Color(0, 0, 0));
       pixels.setPixelColor(q, pixels.Color(0, 0, 0));
       pixels.show();
    
       pixels2.setPixelColor(ww, pixels2.Color(0, 0, 0));
       pixels2.setPixelColor(pp, pixels2.Color(0, 0, 0));
       pixels2.setPixelColor(qq, pixels2.Color(0, 0, 0));
       pixels2.show();
    }
    for(int i=NUMPIXELS; i>0; i--) {
    
    
        pixels.setPixelColor(i, pixels.Color(0, 0, 0));
         pixels.show();
       
        }
    
        for(int i=NUMPIXELS2; i>0; i--) {
    
    
        pixels2.setPixelColor(i, pixels2.Color(0, 0, 0));
         pixels2.show();
       
        }}}
    

    For more information on the specifics of electric currents, watch the video below:

    For more information on circuits, visit this link!

    How Stuff Works: Circuits

    And to wire your own Elegoo Mega, visit the link here:

    Elegoo Mega Data Sheet (pdf)

  • Evelynestallation Blog Post 6!

    Hello, friends! This was a huge week for the project- Cartland and I installed the lights on Saturday, October 19! We completely changed the plan while doing the installation because Cartland realized the lights fit perfectly within little grooves in the wall the media wall is mounted on. It’s going to look so cool!

    I also coded a loop that cycles for the day and one that cycles through the night. I’ll add my code to the bottom of this post!

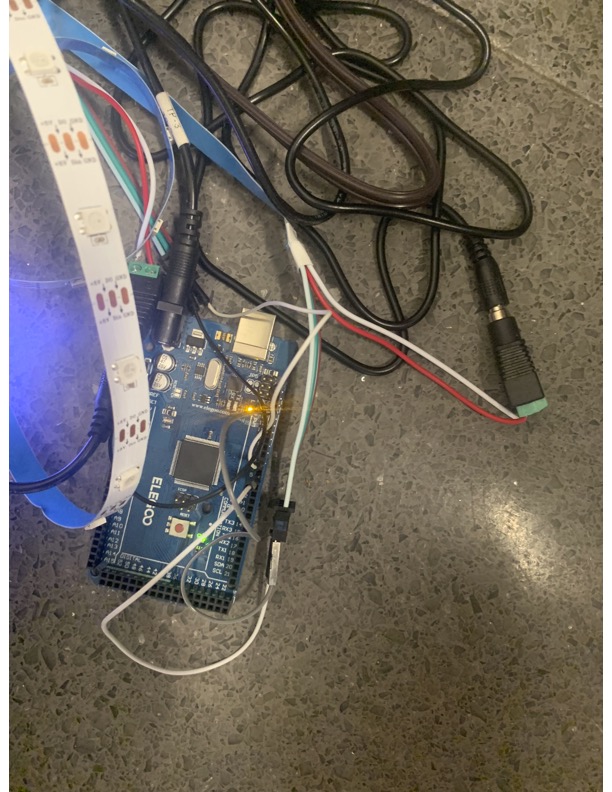
    I had a few difficulties with the amount of voltage going into the lights, so I adjusted the code to be less bright and added a second voltage input for the lights on floor 2. I did accidentally fry the board on the 3rd floor, but we’re getting new ones, so hopefully they’ll work well. Quick tip: when you’re wiring a digital pin, don’t forget to also connect a ground wire to your microcontroller from your lights. Otherwise, you will probably fry your board.

    All we have left to do now is fix the 3rd floor board, check the timing of the code so it works well together, and figure out what we’re putting on the media wall! Come to the HCC on Friday, October 25 to see the lights in action!

    #include <Adafruit_NeoPixel.h>
    #ifdef __AVR__
      #include <avr/power.h>
    #endif
    #define PIN      5
    #define PIN2     7
    #define NUMPIXELS 300
    #define NUMPIXELS2 178
    
    Adafruit_NeoPixel pixels2(NUMPIXELS2, PIN2, NEO_GRB + NEO_KHZ800);
    
    Adafruit_NeoPixel pixels(NUMPIXELS, PIN, NEO_GRB + NEO_KHZ800);
    
    #define DELAYVAL 15
    #define DELAYVAL2 50
    #define DELAYVAL300 10 
    #define BIGDELAYLOOP  15400
    
    
    void setup() {
    #if defined(__AVR_ATtiny85__) && (F_CPU == 16000000)
      clock_prescale_set(clock_div_1);
    #endif
    
      pixels.begin(); 
        pixels2.begin();


    }
    
    void loop() {
      for (int g=0; g<12; g++)
    {
      for(int i=0; i<NUMPIXELS; i++) {
    
    
        pixels.setPixelColor(i, pixels.Color(0, 0, 0));
         pixels.show();
       
        }
        for(int i=0; i<NUMPIXELS2; i++) {
    
    
        pixels2.setPixelColor(i, pixels2.Color(0, 0, 0));
         pixels2.show();
       
        }
      //rainbows comet loop
      
        for(int i=NUMPIXELS; i>71; i--) {
     
       pixels.setPixelColor(i, pixels.Color(255, 0, 0));
       pixels.setPixelColor(i+1, pixels.Color(255, 62.5, 0));
       pixels.setPixelColor(i+2, pixels.Color(255, 127.5, 0));
       pixels.setPixelColor(i+3, pixels.Color(0, 255, 0));
       pixels.setPixelColor(i+4, pixels.Color(0, 127.5, 255));
       pixels.setPixelColor(i+5, pixels.Color(0, 0, 255));
       pixels.setPixelColor(i+6, pixels.Color(255, 0, 255));
       pixels.setPixelColor(i+7, pixels.Color(0, 0, 0));


       pixels.show();
       delay(DELAYVAL300*4);
        }
        
        for(int i=0; i<NUMPIXELS; i++) {
    
    
        pixels.setPixelColor(i, pixels.Color(0, 0, 0));
         pixels.show();
       
        }
        for(int i=22; i<NUMPIXELS2; i++) {
     
       pixels2.setPixelColor(i, pixels2.Color(255, 0, 0));
       pixels2.setPixelColor(i-1, pixels2.Color(255, 62.5, 0));
       pixels2.setPixelColor(i-2, pixels2.Color(255, 127.5, 0));
       pixels2.setPixelColor(i-3, pixels2.Color(0, 255, 0));
       pixels2.setPixelColor(i-4, pixels2.Color(0, 127.5, 255));
       pixels2.setPixelColor(i-5, pixels2.Color(0, 0, 255));
       pixels2.setPixelColor(i-6, pixels2.Color(255, 0, 255));
       pixels2.setPixelColor(i-7, pixels2.Color(0, 0, 0));


       pixels2.show();
       delay(DELAYVAL300*4);
        }
        
        for(int i=0; i<NUMPIXELS2; i++) {
    
    
        pixels2.setPixelColor(i, pixels2.Color(0, 0, 0));
         pixels2.show();
       
        }
         delay(BIGDELAYLOOP);
        
        
        //triple sparkle
    
         for (int a=0; a<100; a++)
    {
    long w= random(0,NUMPIXELS);
    long p= random(0,NUMPIXELS);
    long q= random(0,NUMPIXELS);
    long ww= random(0,NUMPIXELS2);
    long pp= random(0,NUMPIXELS2);
    long qq= random(0,NUMPIXELS2);
    
        pixels.setPixelColor(w, pixels.Color(255, 255, 255));
        pixels.show();
        pixels.setPixelColor(p, pixels.Color(255, 255, 255));
        pixels.show();
        pixels.setPixelColor(q, pixels.Color(255, 255, 255));
        pixels.show();
       
        pixels2.setPixelColor(ww, pixels2.Color(255, 255, 255));
        pixels2.show();
        pixels2.setPixelColor(pp, pixels2.Color(255, 255, 255));
        pixels2.show();
        pixels2.setPixelColor(qq, pixels2.Color(255, 255, 255));
        pixels2.show();
    
       delay(200);
    
       pixels.setPixelColor(w, pixels.Color(0, 0, 0));
       pixels.setPixelColor(p, pixels.Color(0, 0, 0));
       pixels.setPixelColor(q, pixels.Color(0, 0, 0));
       pixels.show();
    
       pixels2.setPixelColor(ww, pixels2.Color(0, 0, 0));
       pixels2.setPixelColor(pp, pixels2.Color(0, 0, 0));
       pixels2.setPixelColor(qq, pixels2.Color(0, 0, 0));
       pixels2.show();
    }
    for(int i=NUMPIXELS; i>0; i--) {
    
    
        pixels.setPixelColor(i, pixels.Color(0, 0, 0));
         pixels.show();
       
        }
    
        for(int i=NUMPIXELS2; i>0; i--) {
    
    
        pixels2.setPixelColor(i, pixels2.Color(0, 0, 0));
         pixels2.show();
       
        }
    //rainbow wash
    
    for (int s=0; s<NUMPIXELS; s++){
     pixels.setPixelColor(s+51, pixels.Color(125, 0, 0));
    pixels.show();
    pixels2.setPixelColor(s, pixels2.Color(125, 0, 0));
    pixels2.show();
       delay(DELAYVAL300*2);
    
        }
        
    
     for(int i=0; i<NUMPIXELS; i++) {
       pixels.setPixelColor(i+51, pixels.Color(125, 62.5, 0));
      
       pixels.show();
       pixels2.setPixelColor(i, pixels2.Color(125, 62.5, 0));
    pixels2.show();
       delay(DELAYVAL300*2);
        }
           
    
        for(int i=0; i<NUMPIXELS; i++) {
       pixels.setPixelColor(i+51, pixels.Color(127.5, 127.5, 0));
      
       pixels.show();
       pixels2.setPixelColor(i, pixels2.Color(127.5, 127.5, 0));
    pixels2.show();
       delay(DELAYVAL300*2);
        }
       
        
         for(int i=0; i<NUMPIXELS; i++) {
       pixels.setPixelColor(i+51, pixels.Color(0, 127.5, 0));
      
       pixels.show();
       pixels2.setPixelColor(i, pixels2.Color(0, 127.5, 0));
    pixels2.show();
       delay(DELAYVAL300*2);
        }
         
    
        for(int i=0; i<NUMPIXELS; i++) {
       pixels.setPixelColor(i+51, pixels.Color(0, 0, 127.5));
       pixels.show();
       pixels2.setPixelColor(i, pixels2.Color(0, 0, 127.5));
    pixels2.show();
       delay(DELAYVAL300*2);
        }


         for(int i=0; i<NUMPIXELS; i++) {
       pixels.setPixelColor(i+51, pixels.Color(75, 0, 100));
       pixels.show();
       pixels2.setPixelColor(i, pixels2.Color (75, 0, 100));
    pixels2.show();
       delay(DELAYVAL300*2);
        }


    for(int i=0; i<NUMPIXELS; i++) {
    
    
        pixels.setPixelColor(i, pixels.Color(0, 0, 0));
         pixels.show();
         pixels2.setPixelColor(i, pixels2.Color(0, 0, 0));
    pixels2.show();
       
        }
    
        //rainbow sparkle
    
     for (int a=0; a<200; a++)
    {
    long w= random(0,NUMPIXELS);
    long p= random(0,NUMPIXELS);
    long q= random(0,NUMPIXELS);
    long ww= random(0,NUMPIXELS2);
    long pp= random(0,NUMPIXELS2);
    long qq= random(0,NUMPIXELS2);
    long x= random(0,255);
    long y= random(0,255);
    long z= random(0,255);
    long xx= random(0,255);
    long yy= random(0,255);
    long zz= random(0,255);
    long xxx= random(0,255);
    long yyy= random(0,255);
    long zzz= random(0,255);
        pixels.setPixelColor(w, pixels.Color(x, y, z));
        pixels.show();
        pixels.setPixelColor(p, pixels.Color(xx, yy, zz));
        pixels.show();
        pixels.setPixelColor(q, pixels.Color(xxx, yyy, zzz));
        pixels.show();
         pixels2.setPixelColor(ww, pixels2.Color(x, y, z));
        pixels2.show();
        pixels2.setPixelColor(pp, pixels2.Color(xx, yy, zz));
        pixels2.show();
        pixels2.setPixelColor(qq, pixels2.Color(xxx, yyy, zzz));
        pixels2.show();
       delay(200);
        pixels.setPixelColor(w, pixels.Color(0, 0, 0));
        pixels.show();
        pixels.setPixelColor(p, pixels.Color(0, 0, 0));
        pixels.show();
        pixels.setPixelColor(q, pixels.Color(0, 0, 0));
        pixels.show();
         pixels2.setPixelColor(ww, pixels2.Color(0, 0, 0));
        pixels2.show();
        pixels2.setPixelColor(pp, pixels2.Color(0, 0, 0));
        pixels2.show();
        pixels2.setPixelColor(qq, pixels2.Color(0, 0, 0));
        pixels2.show();
    
    }
    
        //fade into blue
    
    
    for (int s=0; s<125; s++){
      for(int i=0; i<NUMPIXELS; i++) {
       
     pixels.setPixelColor(i, pixels.Color(0, 0, s));
    pixels.show();
     pixels2.setPixelColor(i, pixels2.Color(0, 0, s));
    pixels.show();
    for (int f=0; f<5; f++)
    {
      s++;
    }
       
      }
    
        }
        //fade every other to pink
    
      for (int r=0; r<125; r++) {
        for(int i=0; i<NUMPIXELS; i++) {
       if (i % 2 == 0) {
    pixels.setPixelColor(i, pixels.Color(r, 0, 125));
    pixels.show();
     pixels2.setPixelColor(i, pixels2.Color(r, 0, 125));
    pixels2.show();
    for (int f=0; f<5; f++)
    {
      r++;
    }
       
       }
       
       
      }
      }
    
    
      //blue/pink marquee
    
      for (int f=0; f<5; f++){
        for(int i=0; i<NUMPIXELS; i++) {
       if (i % 2 == 0) {
    pixels.setPixelColor(i, pixels.Color(0, 0, 125));
    pixels.show();
     pixels2.setPixelColor(i, pixels2.Color(0, 0, 125));
    pixels2.show();
       }
       else {
        pixels.setPixelColor(i, pixels.Color(63, 0, 63));
    pixels.show();
     pixels2.setPixelColor(i, pixels2.Color(63, 0, 63));
    pixels2.show();
       }
       
      }
      delay (100);
    
     for(int i=0; i<NUMPIXELS; i++) {
       if (i % 2 == 0) {
    pixels.setPixelColor(i, pixels.Color(63, 0, 63));
    pixels.show();
    pixels2.setPixelColor(i, pixels2.Color(63, 0, 63));
    pixels2.show();
       }
       else {
        pixels.setPixelColor(i, pixels.Color(0, 0, 125));
    pixels.show();
    pixels2.setPixelColor(i, pixels2.Color(0, 0, 125));
    pixels2.show();
       }
       
      }
    
    delay (100);
      } 
    
    //fade all to pink 
    
    for (int r=0; r<63; r++) {
        for(int i=0; i<NUMPIXELS; i++) {
       if (i % 2 ==! 0) {
    pixels.setPixelColor(i, pixels.Color(r, 0, 63));
    pixels.show();
    pixels2.setPixelColor(i, pixels2.Color(r, 0, 63));
    pixels2.show();
    r++;
    
       }
       
      }
      }
      //reverse wash out 
    for (int s=NUMPIXELS; s>0; s--){
     pixels.setPixelColor(s, pixels.Color(0, 0, 0));
    pixels.show();
    pixels2.setPixelColor(s-122, pixels2.Color(0, 0, 0));
    pixels2.show();
       delay(DELAYVAL300);
    
        }
    
    
    //end of 5 minute code
        for (int p = 0; p<55; p++)
      {
    int x=0;
    
    int y = 50;
    
    //blue set and sparkle
      for(int i=0; i<NUMPIXELS; i++) {
    pixels.setPixelColor(i, pixels.Color(0, 0, y));
    pixels.show();
    pixels2.setPixelColor(i, pixels2.Color(0, 0, y));
    pixels2.show();
      }
    
    for (int a=0; a<60; a++)
    {
    long w= random(0,NUMPIXELS);
        pixels.setPixelColor(w, pixels.Color(255, 255, 255));
        pixels.show();
        pixels2.setPixelColor(w, pixels2.Color(255, 255, 255));
    pixels2.show();
       delay(225);
       pixels.setPixelColor(w, pixels.Color(0, x, y));
       pixels2.setPixelColor(w, pixels2.Color(0, x, y));
    pixels2.show();
    }
    
      //green shift, 225 delayvals
    
    for (int z = 0; z<50; z++){
    
    for(int i=0; i<NUMPIXELS; i++) {
    
    pixels.setPixelColor(i, pixels.Color(0, x, y));
    
    pixels.show();
    
    pixels2.setPixelColor(i, pixels2.Color(0, x, y));
    pixels2.show();
    
    }
    
    delay(DELAYVAL);
    
    y--;
    
    x++; }


    //sparkle, 450 delayvals
    
    for (int a=0; a<60; a++)
    {
    long w= random(0,NUMPIXELS);
        pixels.setPixelColor(w, pixels.Color(255, 255, 255));
        pixels.show();
        pixels2.setPixelColor(w, pixels2.Color(255, 255, 255));
    pixels2.show();
       delay(225);
       pixels.setPixelColor(w, pixels.Color(0, x, y));
       pixels.show();
       pixels2.setPixelColor(w, pixels2.Color(0, x, y));
    pixels2.show();
    }


    //shift to blue, 255 delayvals
    
    for (int p = 0; p<50; p++){
    
    for(int i=0; i<NUMPIXELS; i++) {
    
    pixels.setPixelColor(i, pixels.Color(0, x, y));
    
    pixels.show();
    pixels2.setPixelColor(i, pixels2.Color(0, x, y));
    pixels2.show();
    
    }
    
    delay(DELAYVAL);
    
    y++;
    
    x--; }
    
    
    }
      //end of 12 hour daytime loop
    
      //begin 12 hour nighttime loop-- 2400 repetitions of 30-second loop
    
      for (int q=0; q<2400; q++)
      {
      int x=0;
      int y=0;
      int z=120;
    
    for (int t=0; t<50; t++) //red to green
    {
    for(int i=0; i<NUMPIXELS; i++) {
    
    pixels.setPixelColor(i, pixels.Color(z, x, y));
    
    pixels.show();
    pixels2.setPixelColor(i, pixels2.Color(z, x, y));
    pixels2.show();
    
    }
    
    delay(DELAYVAL2);
    
    z--;
    x++;
    }
    
    for (int t=0; t<50; t++) //green to blue
    {
    for(int i=0; i<NUMPIXELS; i++) {
    
    pixels.setPixelColor(i, pixels.Color(z, x, y));
    
    pixels.show();
    pixels2.setPixelColor(i, pixels2.Color(z, x, y));
    pixels2.show();
    
    }
    
    delay(DELAYVAL2);
    
    y++;
    x--;
    }
    
    for (int t=0; t<50; t++) //blue to red
    {
    for(int i=0; i<NUMPIXELS; i++) {
    
    pixels.setPixelColor(i, pixels.Color(z, x, y));
    
    pixels.show();
    pixels2.setPixelColor(i, pixels2.Color(z, x, y));
    pixels2.show();
    
    }
    
    delay(DELAYVAL2);
    
    y--;
    z++;
    } 
     
      }
        
    }
    }
    
  • Evelynestallation Blog Post #5!

    Hey everyone! Thanks for reading today’s blog post! For the past two weeks, I’ve looked at several big questions that will dictate the course of this entire project. The first question is how to power the lights. They run off of 5 volt energy, and a typical wall socket puts out 240 volts. That’s a huge difference. Fortunately, Amazon sells a product that steps down the voltage from a wall socket to 5 volts. Here’s the link- it even comes with a little piece that lets me attach wires to the positive and negative outputs!

    Amazon link DC power converter

    However, the next big question doesn’t have a quick Amazon fix. We want to sync these lights up to the HCC media wall, which would be insanely cool. I met with Josiah, who runs the Media Wall, on Monday. He told me that the media wall is controlled by a Macbook and is connected via cables that run from the projector to a closet on the second floor of the HCC. The projector itself can’t connect to WiFi or Bluetooth. Upon further reflection, the best way to sync the lights with an ethernet-controlled projector is probably… massive amounts of code that time the lights really specifically. Oh, and turning everything on at the exact same time.

    Trying to brute-force the project presents another difficulty: that of timing. Arduino coding can do almost anything, but what it can’t do is magically know the time. In order to set the lights on a cycle that matches the media wall during the day and shifts to something soothing at night, I have to program the Arduino to count every second and add it all up.

    I visited my favorite Internet forum (Arduino Project Hub) to find out more about counting seconds and found some handy open-source code made for a clock. I’m attaching the link below as this blog post’s code. Of course, it’ll take modification, but there is potential within this code for a 24-hour system that controls sparkly lights and changes vibes completely during the night. I hope you have fun with this code, and I can’t wait to include my version of it!

    Arduino Clock Project

  • Evelynestallation Blog Post #4!

    It’s been such a busy few weeks that I haven’t made it into the DKC! However, I do have more fun code! This one is a variation of the code I used in blog post #2, but this time it has sparkles added in. See if you can spot the difference! When I think about coding lights, adding sparkles is both one of my favorite things to do and one of the most difficult because it requires the inclusion of random selection. If I end up hard coding the lights, which I’m leaning towards, I’d definitely include this code!

    Also, depending on the lights you get, this code may make your lights different colors. It’s set for RGB lights, which means that red is the first number in the “pixels.Color(x, 0, y)” command. However, some lights are GRB lights and would interpret the first number, or x, as the color green. If that’s the case, you can switch the x value and the 0!

    If you want to choose your own colors, you can reference the chart on this website!

    Rapid Tables RGB Color Chart

    Happy coding!

    #include <Adafruit_NeoPixel.h>
    #ifdef __AVR__
      #include <avr/power.h>
    #endif
    #define PIN       5
    #define NUMPIXELS 60
    
    Adafruit_NeoPixel pixels(NUMPIXELS, PIN, NEO_GRB + NEO_KHZ800);
    #define DELAYVAL 30
    
    void setup() {
    #if defined(__AVR_ATtiny85__) && (F_CPU == 16000000)
      clock_prescale_set(clock_div_1);
    #endif
    
      pixels.begin(); 
    
    }
    
    void loop() {
    
     int x=255;
      int y = 0; 
      for (int z = 0; z<255; z++){
       
         for(int i=0; i<NUMPIXELS; i++) {
          
       pixels.setPixelColor(i, pixels.Color(x, 0, y));
       pixels.show(); 
       
       
       }
       long w= random(0,NUMPIXELS);
        pixels.setPixelColor(w, pixels.Color(255, 255, 255));
        pixels.show();
       delay(DELAYVAL);
       x--;
       y++; }
    
       for (int p = 0; p<255; p++){
       
         for(int i=0; i<NUMPIXELS; i++) {
          
       pixels.setPixelColor(i, pixels.Color(x, 0, y));
       pixels.show(); 
       
       
       }
       long w= random(0,NUMPIXELS);
        pixels.setPixelColor(w, pixels.Color(255, 255, 255));
        pixels.show();
       delay(DELAYVAL);
       x++;
       y--; }
       
     } 
  • Evelynestallation Blog Post #3!

    Guess what- the sparkle lights came in this week! I tested the 5 volt LED strip with both the ESP8266 chip and the hard-coded Arduino Uno. The 5 volt strip lit up extremely well. I didn’t see any signs of voltage drop in the 60 light strip. Hopefully that means I can use the light strips instead of the strands for this project. The strips come with an adhesive backing, and as such, they’re far easier to install in any given location.

    However, this week wasn’t perfect. I tried to set up the WiFi connection with the ESP8266 chip and it didn’t work. In fact, I tried on two different days, and I even tried to use the Apogee WiFi system instead of the UMW one. I think that it’s going to be impossible to set up something reliable on UMW WiFi. Too many people log on and off of the system in the HCC every day.

    Here’s a helpful hint if you’re using a WiFi connectable chip: check the IP address on the computer you’re controlling it from and see if the first two sections match. That means you’re on the same network as your chip and you’re able to send data to it! For some versions of the IP address, you might need to check the first three sections. The last section is always specific to your device. It’s like a name for your computer (or chip) that the network can reference!

    I’ve attached yet another set of code, this one for a 60 light strand. I hope you have fun trying this out, because it’s my favorite code yet! It’s called the Rainbow Comet!

    #include <Adafruit_NeoPixel.h>
    #ifdef __AVR__
      #include <avr/power.h>
    #endif
    #define PIN       5
    #define NUMPIXELS 60
    
    Adafruit_NeoPixel pixels(NUMPIXELS, PIN, NEO_GRB + NEO_KHZ800);
    #define DELAYVAL 30
    
    void setup() {
    #if defined(__AVR_ATtiny85__) && (F_CPU == 16000000)
      clock_prescale_set(clock_div_1);
    #endif
    
      pixels.begin(); 
    
    }
    
    void loop() {
    
      for(int i=0; i<NUMPIXELS; i++) {
    
        pixels.setPixelColor(i, pixels.Color(0, 0, 0));
         pixels.show();
       
        }
       for(int i=0; i<NUMPIXELS; i++) {
     
       pixels.setPixelColor(i, pixels.Color(255, 0, 0));
       pixels.setPixelColor(i-1, pixels.Color(255, 62.5, 0));
       pixels.setPixelColor(i-2, pixels.Color(255, 127.5, 0));
       pixels.setPixelColor(i-3, pixels.Color(0, 255, 0));
       pixels.setPixelColor(i-4, pixels.Color(0, 127.5, 255));
       pixels.setPixelColor(i-5, pixels.Color(0, 0, 255));
       pixels.setPixelColor(i-6, pixels.Color(255, 0, 255));
       pixels.setPixelColor(i-7, pixels.Color(0, 0, 0));


       pixels.show();
       delay(DELAYVAL);
        }
    }
  • Evelynestallation Blog Post #2!

    Hello! Thank you for taking a look at my second blog post!

    For the past 2 weeks, I’ve been planning how to test various types of lights and connectors to see what would work best in the HCC. I put together a purchase list with 2 types of lights (strand lights and strip lights) and 2 types of microcontrollers, or chips. One of them can connect to WiFi! Another thing I added to my purchase list was a power converter that takes power from a wall outlet and dials it down so that I can use my boards without frying them. Typical wall outlets are designed to put out 120 volts of power, which can power a TV. The hard-coded chip I’m going to test runs on 7-12 volts, and the WiFi connectable one runs on 5, so if I fed 120 volts of power into either chip, I’d probably start a fire. When I’m testing, I plan to connect the WiFi connectable chip directly to my computer for power.

    Pro tip: never attach your computer to a system that’s also powered by a battery or a wall outlet. It will probably destroy your computer, and it could also cause a fire. Maybe “things that could cause a fire” should be the title of this blog post!

    Here’s the list of things that I hope to purchase, with links:

    I’ve added more fun sparkle lights code below! Try this code out and see what happens. I hope you enjoyed this post and I look forward to writing all about my adventures testing lights and chips!

    #include <Adafruit_NeoPixel.h>
    
    #ifdef __AVR__
    
    #include <avr/power.h>
    
    #endif
    
    #define PIN 5
    
    #define NUMPIXELS 50
    
    Adafruit_NeoPixel pixels(NUMPIXELS, PIN, NEO_GRB + NEO_KHZ800);
    
    #define DELAYVAL 10
    
    void setup() {
    
    #if defined(__AVR_ATtiny85__) && (F_CPU == 16000000)
    
    clock_prescale_set(clock_div_1);
    
    #endif
    
    pixels.begin();
    
    for(int i=0; i<NUMPIXELS; i++) {
    
    pixels.setPixelColor(i, pixels.Color(0, 125, 255));
    
    pixels.show();
    
    }
    
    }
    
    void loop() {
    
    int x=255;
    
    int y = 0;
    
    for (int z = 0; z<255; z++){
    
    for(int i=0; i<NUMPIXELS; i++) {
    
    pixels.setPixelColor(i, pixels.Color(0, x, y));
    
    pixels.show();
    
    }
    
    delay(DELAYVAL);
    
    x--;
    
    y++; }
    
    for (int p = 0; p<255; p++){
    
    for(int i=0; i<NUMPIXELS; i++) {
    
    pixels.setPixelColor(i, pixels.Color(0, x, y));
    
    pixels.show();
    
    }
    
    delay(DELAYVAL);
    
    x++;
    
    y--; }
    
    }

  • Evelynestallation Blog Post #1!

    Hello, everyone! My name is Evelyne Breed. I’m a UMW student and sparkly things enthusiast. Thank you so much for taking a look at my very first blog post! I’m so excited to chronicle my adventures in the field of electronics with you. I hope you enjoy this post and follow along with the project! (Read on for a tiny tutorial on how to wire up your own sparkle lights!)

    These past two weeks, I’ve thought a lot about my plan to install a series of panels of LED lights in the HCC that can illuminate in various colors and patterns. In order to communicate my ideas, I created a video that displayed some light effects I could do using hard-coded or WiFi-connected lights and listed the pros and cons for both. For the hard-coded lights, I used the Arduino IDE app, which uses a variant of the C++ coding language. The WiFi-connected lights are far easier to program. I used an app called XLights, which allows me to drag and drop effects as I please! As you’ll see in the video, the lights could look like rainbows of color, subtly fade between hues, or even flicker like fire.

    Of course, I couldn’t just focus on the lights themselves. The lights need to be organized and attached to the HCC in some way. This week, I sketched a potential design for a panel that could be replicated and interlocked to create a long, skinny light matrix. My current idea is to line the upper railings in the HCC with these panels so that the lights run throughout the room. I’ve attached pictures of my initial sketches below.

    Sketch of potential lights panel detailing 3 strands of lights and interlocking edges
    Sketch highlighting the second floor HCC railing to show where lights could go

    Perhaps the most important part of planning a project is figuring out what you actually need to complete said project. My favorite lights to work with are RGB LEDs- that is, they light up in any color- and for this project, I plan to choose 12 volt lights. The reason why I’d choose 12 volt lights over 5 volt lights is that voltage can drop over long stretches of lights. If I use lights with a higher voltage, I can make the strand longer before I have to add in more power. If I decide to hard-code the lights, I would choose an Arduino that works with the IDE app. I’m familiar with the Elegoo Mega chip, so I would probably choose that one. Otherwise, I’ll have to do research into which WiFi-connectable chips are the most reliable for large amounts of lights. I’ve used an ESP8266 chip in the past to connect to WiFi, but it’s a rather finicky little thing and it sometimes fries itself for no apparent reason.

    I’ve attached a list below with all of the components you’d need to create your own version of the hard-coded lights I used in my video. The lights link will take you to a place where you can purchase a 5v strand or a 12v strand of lights. The 5v strand can be powered by your computer, so I’d recommend using that one. I”ll also’ve also added some basic code to make your lights run through the colors of the rainbow, although in order to use it, you need to download the Arduino IDE app and the Adafruit NeoPixel library. In order to connect the chip to the lights, put one connector wire into the ground (GND) pin on the chip and put it in the GND side of the lights connector. Do the same with the voltage out (VOUT) pin on the chip and the voltage side of the connector. Lastly, use your third connector wire to connect pin 5 on the chip to the central port on the lights connector. That’s all there is to it!

    #include <Adafruit_NeoPixel.h>

    #ifdef __AVR__

    #include <avr/power.h>

    #endif

    #define PIN 5

    #define NUMPIXELS 50

    Adafruit_NeoPixel pixels(NUMPIXELS, PIN, NEO_GRB + NEO_KHZ800);

    #define DELAYVAL 10

    void setup() {

    #if defined(__AVR_ATtiny85__) && (F_CPU == 16000000)

    clock_prescale_set(clock_div_1);

    #endif

    pixels.begin();

    for(int i=0; i<NUMPIXELS; i++) {

    pixels.setPixelColor(i, pixels.Color(0, 125, 255));

    pixels.show();

    }

    }

    void loop() {

    //

    //delay(DELAYVAL);

    //

    for(int i=0; i<NUMPIXELS; i++) {

    pixels.setPixelColor(i, pixels.Color(0, 255, 0));

    pixels.show();

    delay(DELAYVAL);

    }

    for(int i=0; i<NUMPIXELS; i++) {

    pixels.setPixelColor(i, pixels.Color(125, 255, 0));

    pixels.show();

    delay(DELAYVAL);

    }

    for(int i=0; i<NUMPIXELS; i++) {

    pixels.setPixelColor(i, pixels.Color(255, 255, 0));

    pixels.show();

    delay(DELAYVAL);

    }

    for(int i=0; i<NUMPIXELS; i++) {

    pixels.setPixelColor(i, pixels.Color(255, 0, 0));

    pixels.show();

    delay(DELAYVAL);

    }

    for(int i=0; i<NUMPIXELS; i++) {

    pixels.setPixelColor(i, pixels.Color(0, 0, 255));

    pixels.show();

    delay(DELAYVAL);

    }

    for(int i=0; i<NUMPIXELS; i++) {

    pixels.setPixelColor(i, pixels.Color(0, 125, 255));

    pixels.show();

    delay(DELAYVAL);

    }